Everything you need to take a job from a blank floor plan to a finished, exportable sign package — tools, settings, sign types, placement, messages, images, pictograms, braille, counts, exports, and sharing.
Contents — 20 parts
The general workflow. Most jobs go through two passes. First pass: upload the floor plan and mark
every location with just a sign type — no message or image yet — then open Quick Counts
(part 11) for a fast type-by-floor total you can use for pricing. Second pass:
if the job moves forward, come back and fill in each sign's message and upload the image for each
sign type (parts 12–13) before exporting. This guide is ordered to match that
workflow, so you can stop after part 11 and pick up later exactly where you left off.
Tip: click any screenshot in this guide to open a larger version.
The basics
01
Start a project
A project holds one or more floor plans, plus all the signs, messages, and settings that belong to the job. You'll create a project first, then upload a floor plan into it.
1
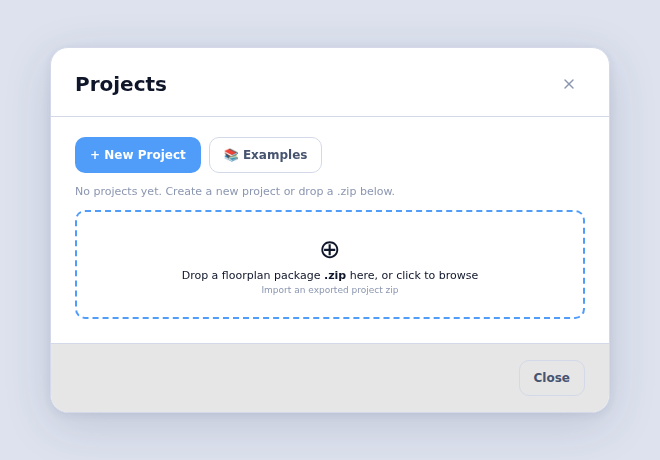
Open the editor. The Projects window lists everything you've already created — click a row to open it. To begin a new job, click + New Project, type a name, and confirm.
Two other ways in from this window: 📚 Examples loads a ready-made sample project so you can explore a finished job, and the drop zone at the bottom imports a project .zip that was previously exported from Planqix (drag it on, or click to browse).
2
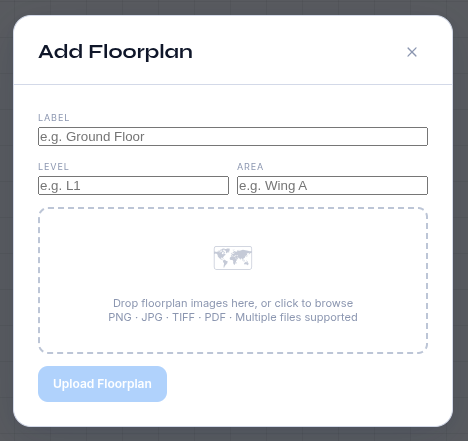
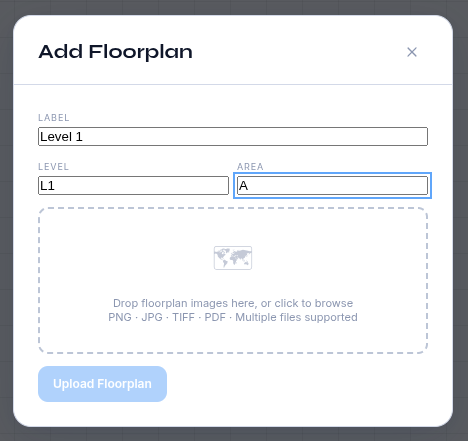
Planqix opens your new project and immediately asks for a floor plan. Fill in the details that identify this sheet:
LabelThe name you'll see on the tab and in the sidebar — e.g. Ground Floor. This is the only required field.
LevelOptional short level code, e.g. L1. Appears in the schedule and exports.
AreaOptional zone or wing name, e.g. Wing A — useful when one level is split across several sheets.
3
Click the drop zone (or drag files onto it) to choose your drawing. Planqix accepts PNG, JPG, TIFF, and PDF, and you can select several files at once — each one becomes its own floor plan.
4
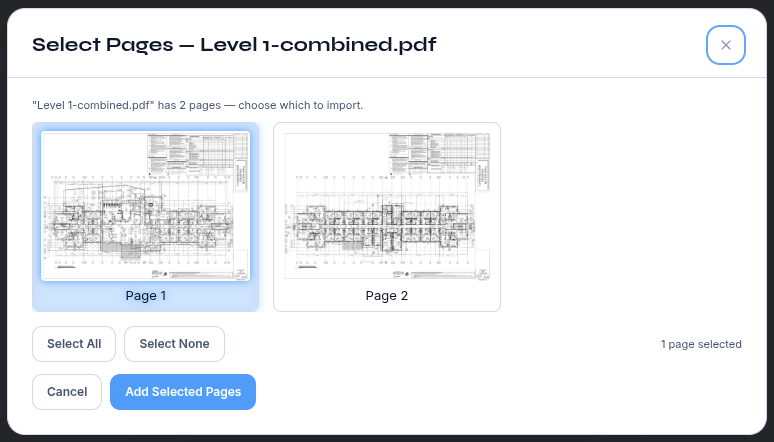
If you picked a PDF, a page selector opens showing a thumbnail of every page. Tick the sheets you actually want (Select All and Select None help with big sets, and Load More Pages pulls in further thumbnails on long documents), then click Add Selected Pages. Each selected page becomes a separate floor plan.
5
Click Upload Floorplan. Your drawing loads into the editor exactly as-is, and you're ready to start placing signs on top of it.
02
Find your way around the editor
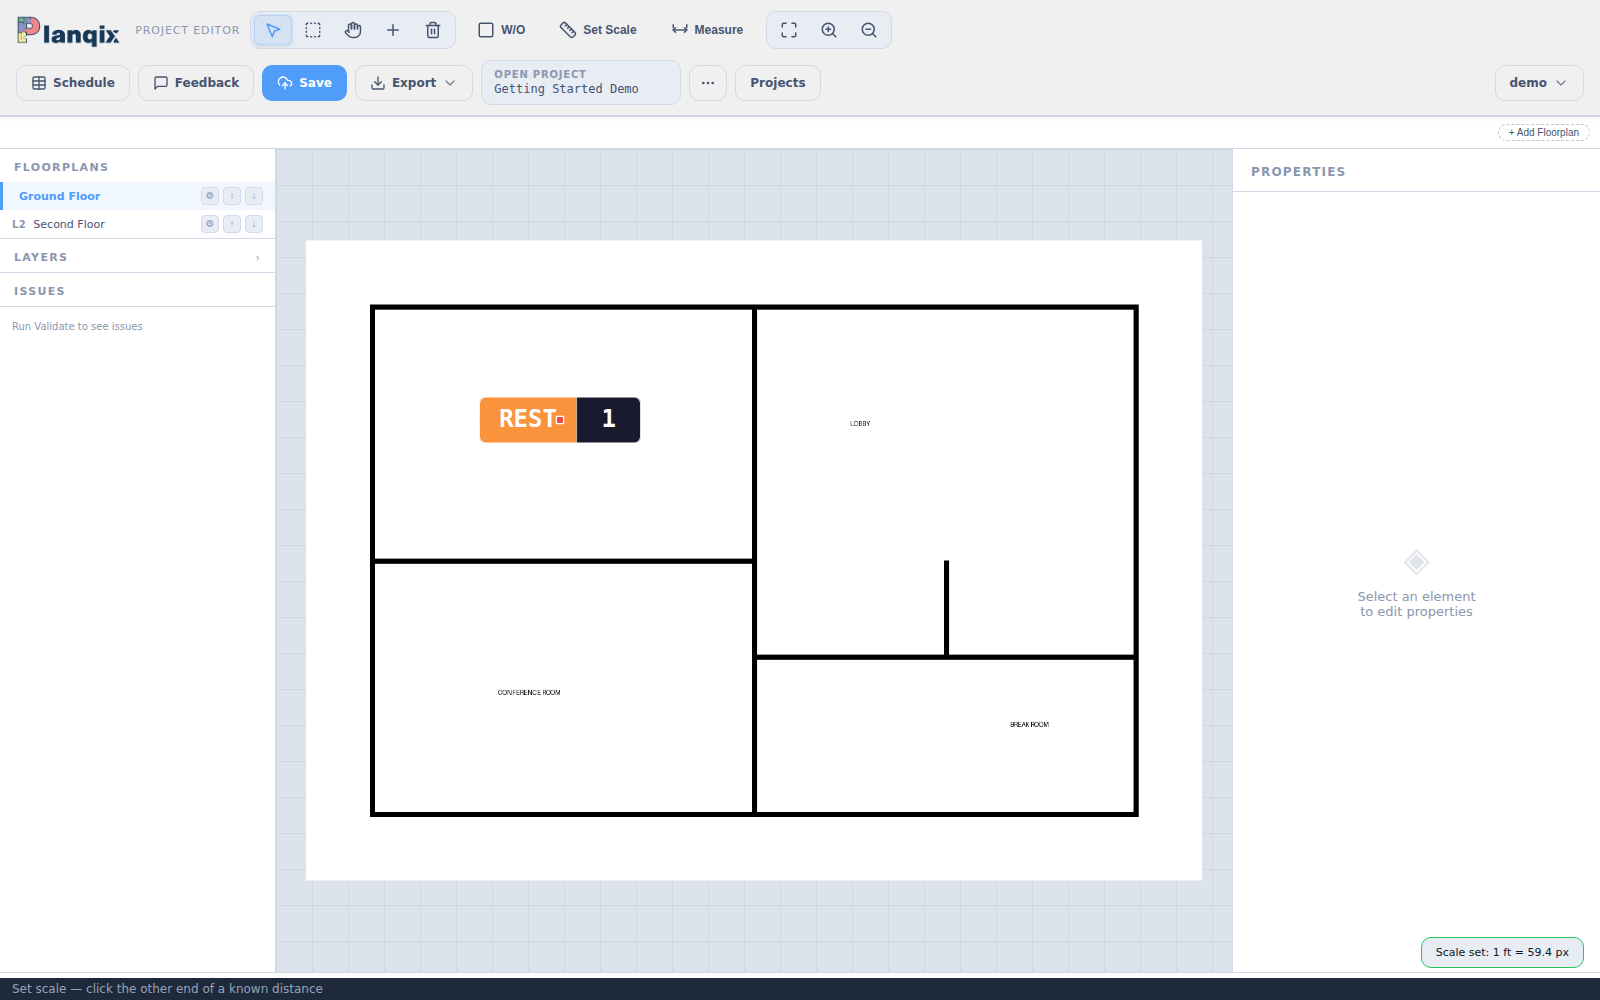
Before placing anything, it helps to know what the five regions of the screen are for. You'll spend most of your time in the canvas and the Properties panel.
1
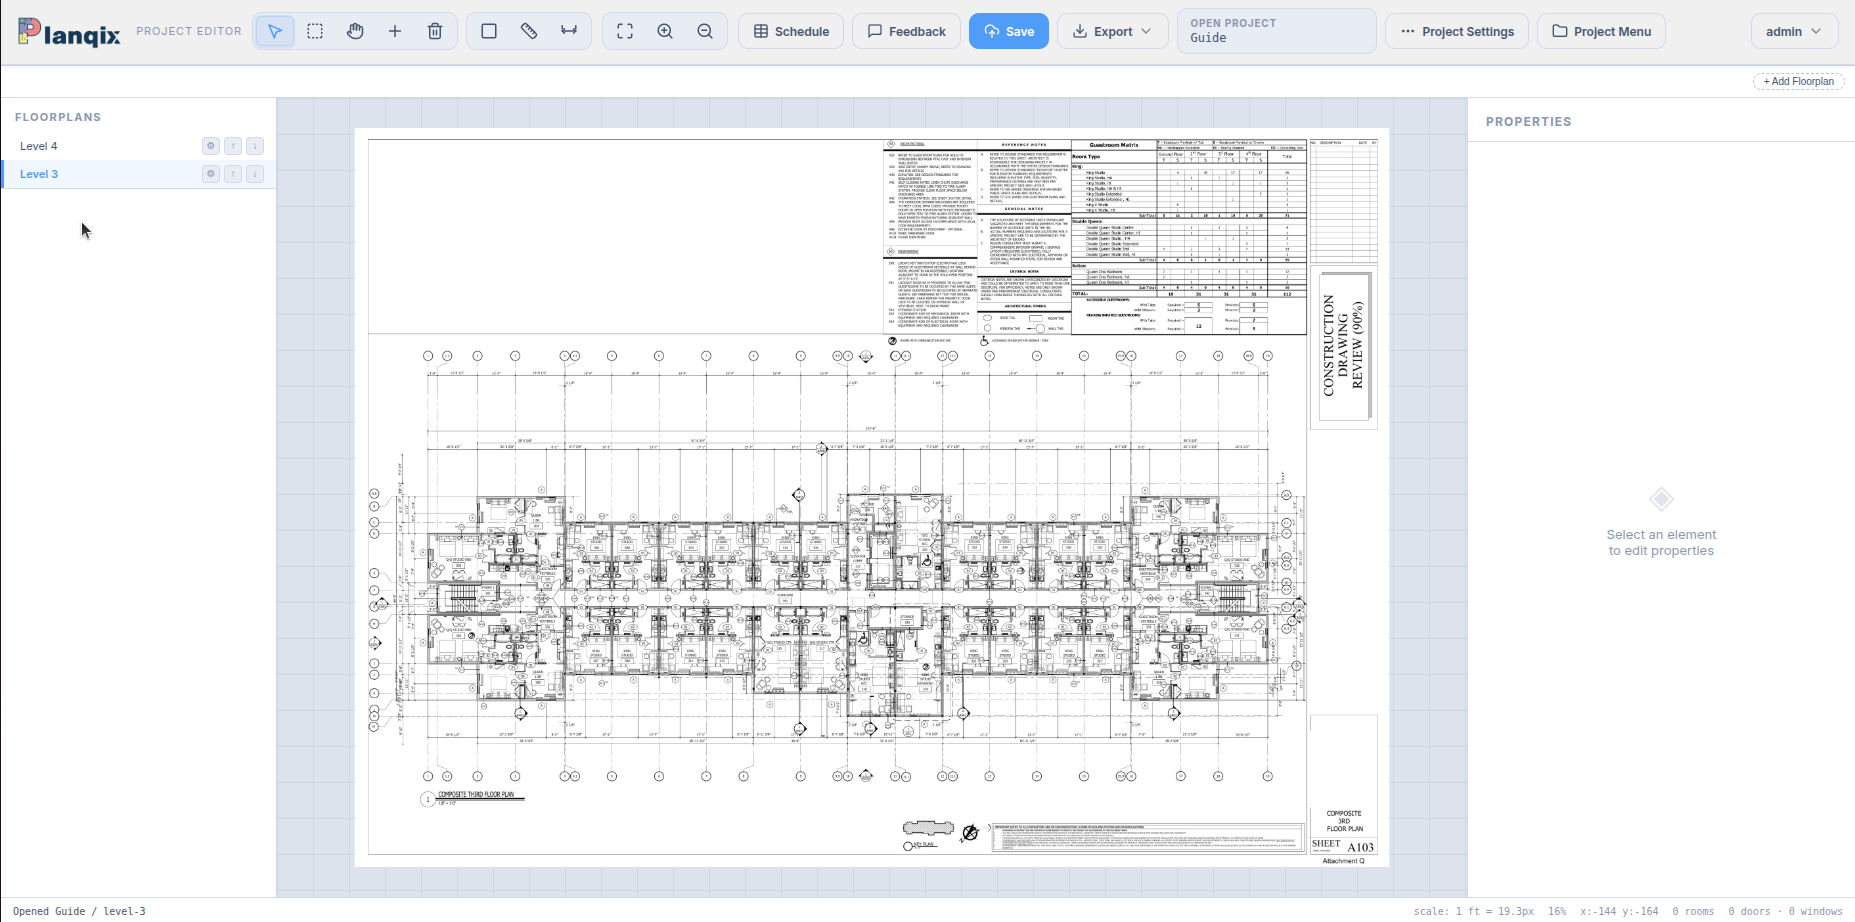
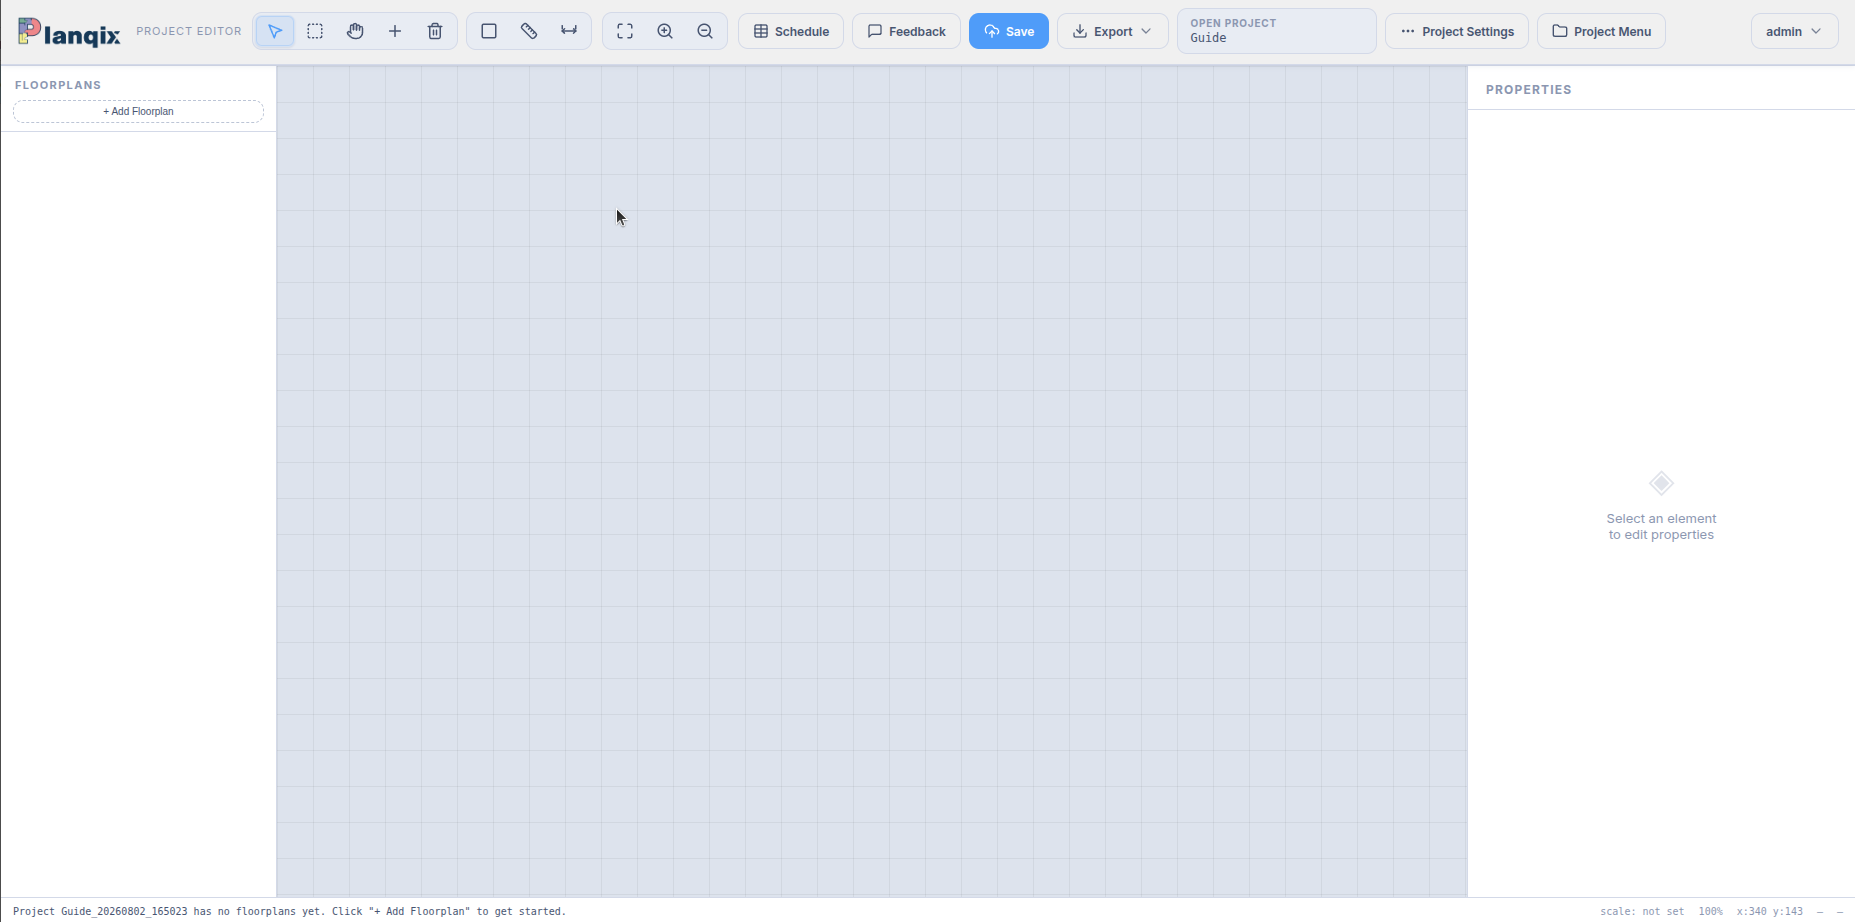
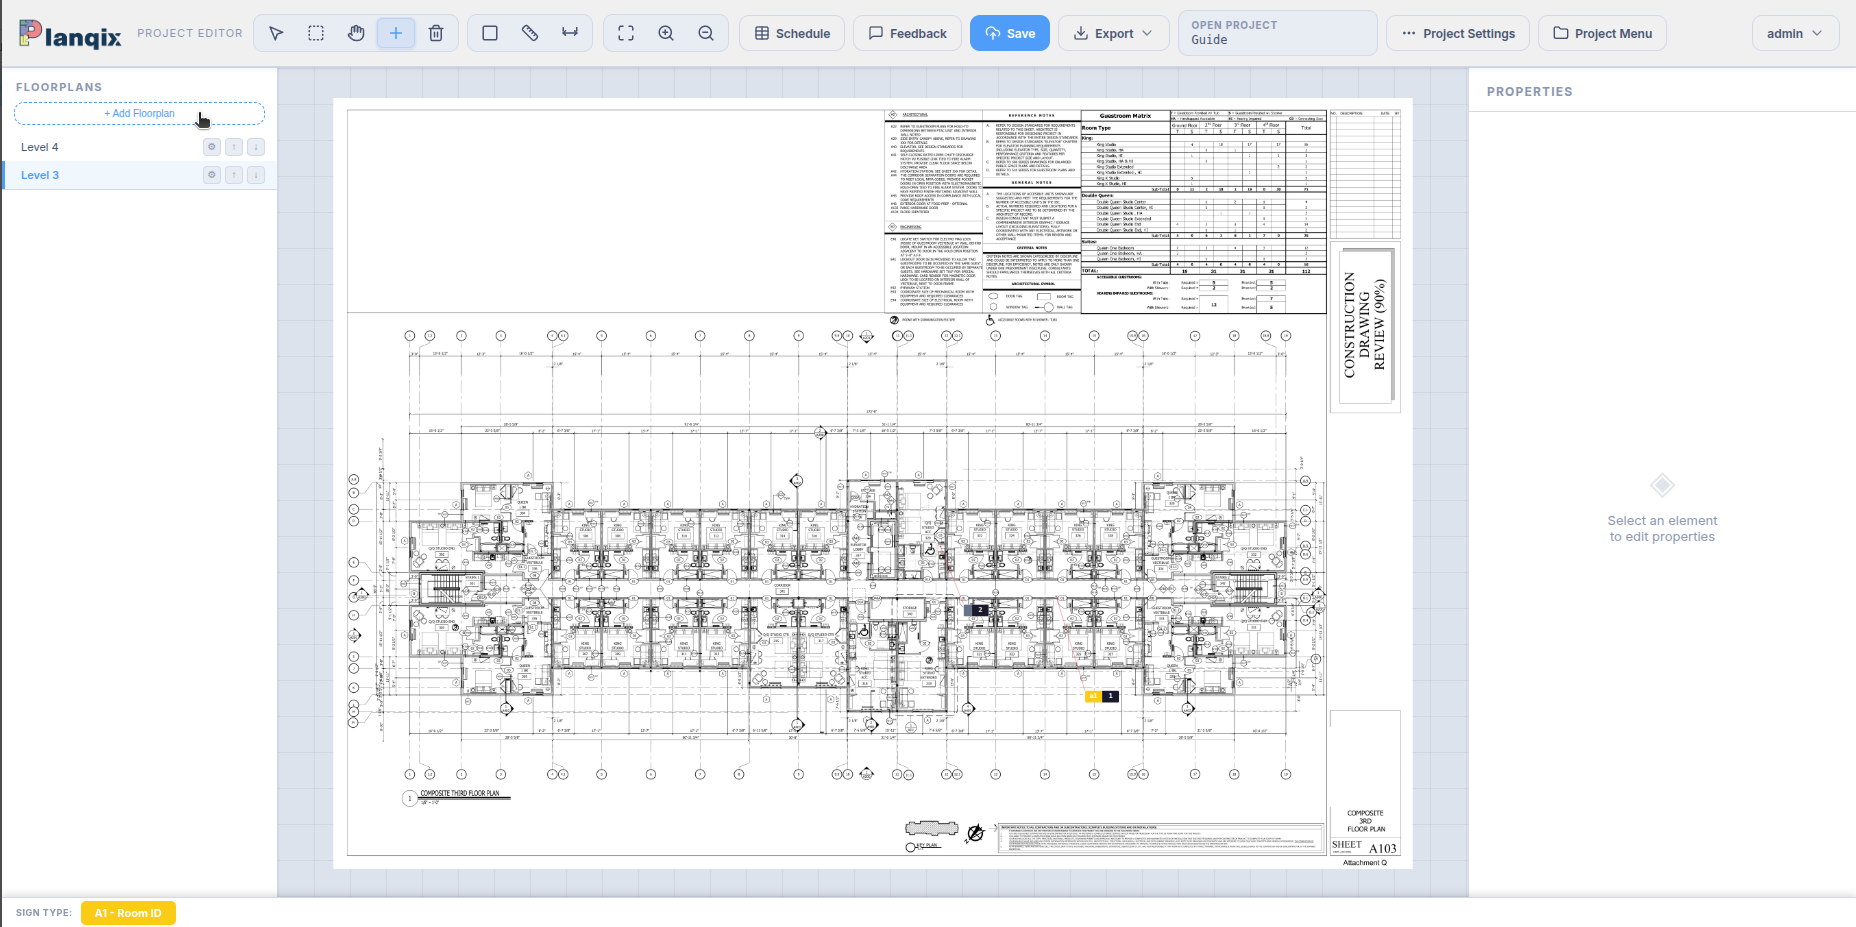
The editor is laid out like this:
Toolbar (top)Every tool and project action. Full reference in Tools & settings.
Left sidebarA tab for each floor plan, plus + Add Floorplan at the top to add another sheet.
Canvas (centre)Your drawing, with signs placed on top. Scroll to zoom, and drag with the Pan tool to move around.
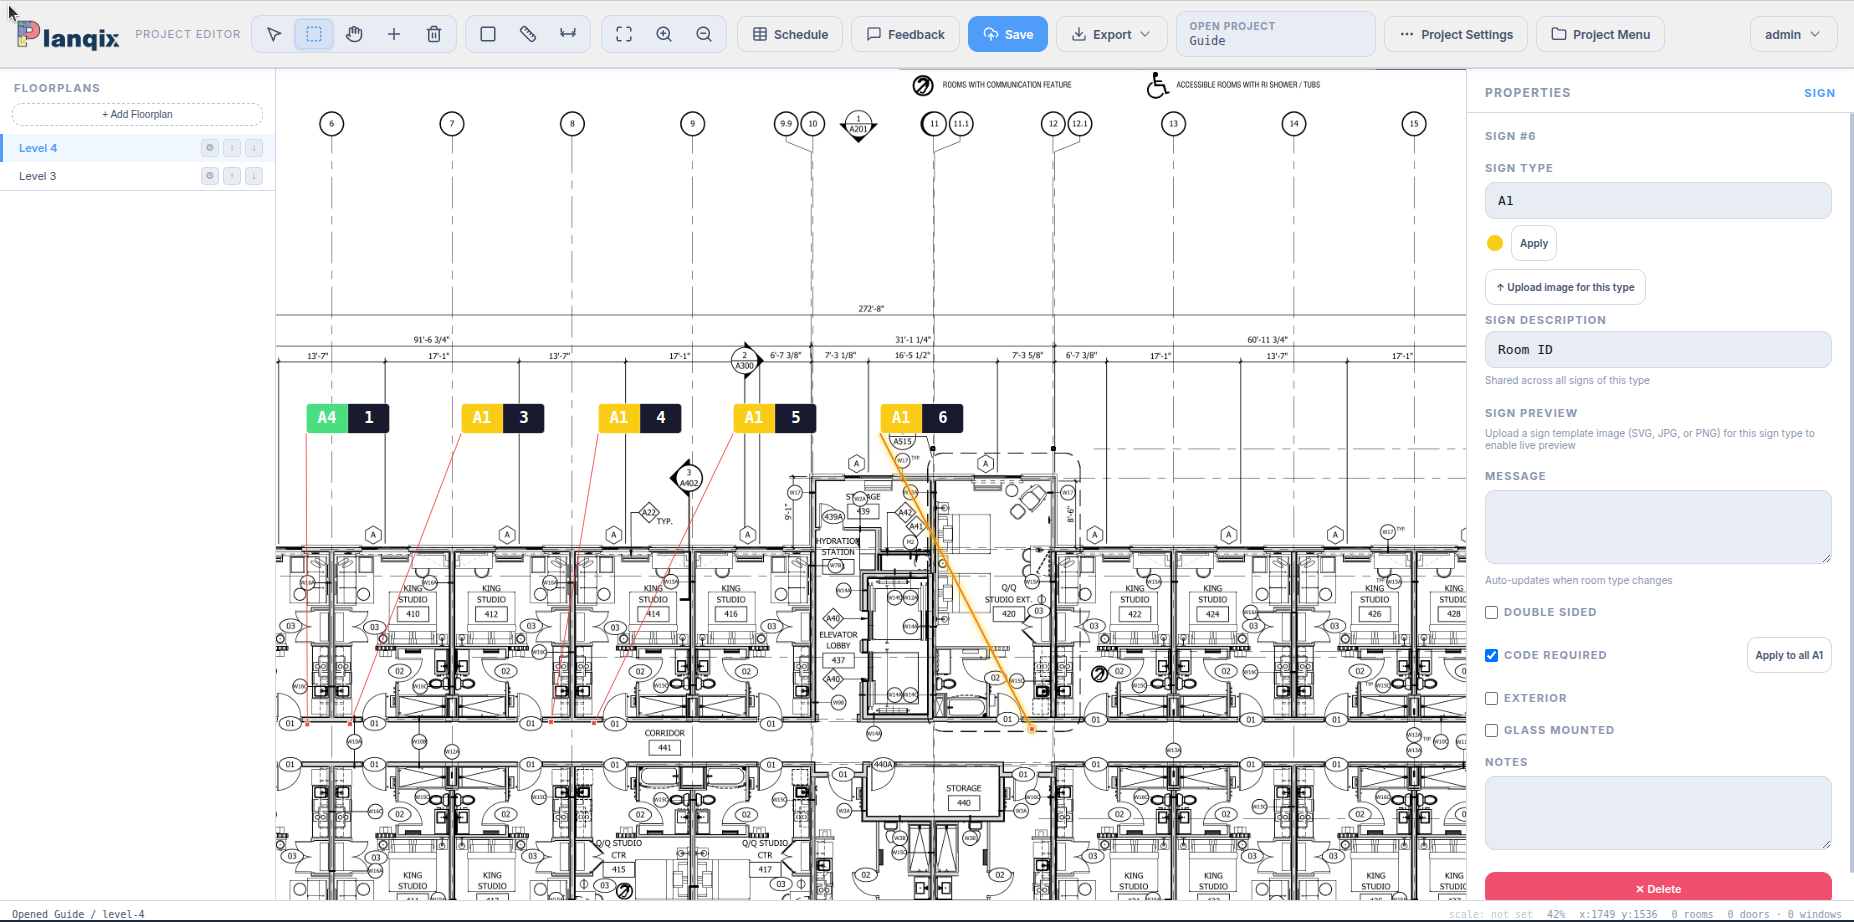
Properties panel (right)Everything about whatever you currently have selected. Empty until you select something. With a sign selected it opens with the type and number always visible at the top, and the rest folded into three collapsible sections — Artwork & images, Messages & settings, and Sign preview. Click a section header to fold or unfold it; Planqix remembers which ones you keep closed.
Status bar (bottom)Current status message, scale, zoom level, and cursor position.
03
Tools & settings overview
A complete reference for every button in the toolbar and every option in Settings. Skim it now and come back when you need it — each entry links to the section that covers it in depth.
1
The toolbar along the top of the editor holds every tool you'll use to build out a plan:
SelectClick a sign to select it and edit it in the Properties panel. Also used to drag signs around. Shortcut V.
Select multipleDrag a box around several signs to select them all at once — see Select, align & delete.
PanDrag to move around the canvas. Shortcut H. You can also pan at any time by dragging with the middle mouse button.
Add sign (+)Drop new signs onto the plan — see Add signs.
TextAdds a free-text note straight onto the plan: click where the text should go, type, then click away or press Esc when done. Shortcut T. Existing notes can be dragged or deleted like signs.
DeleteRemoves whatever is currently selected. Shortcut Del.
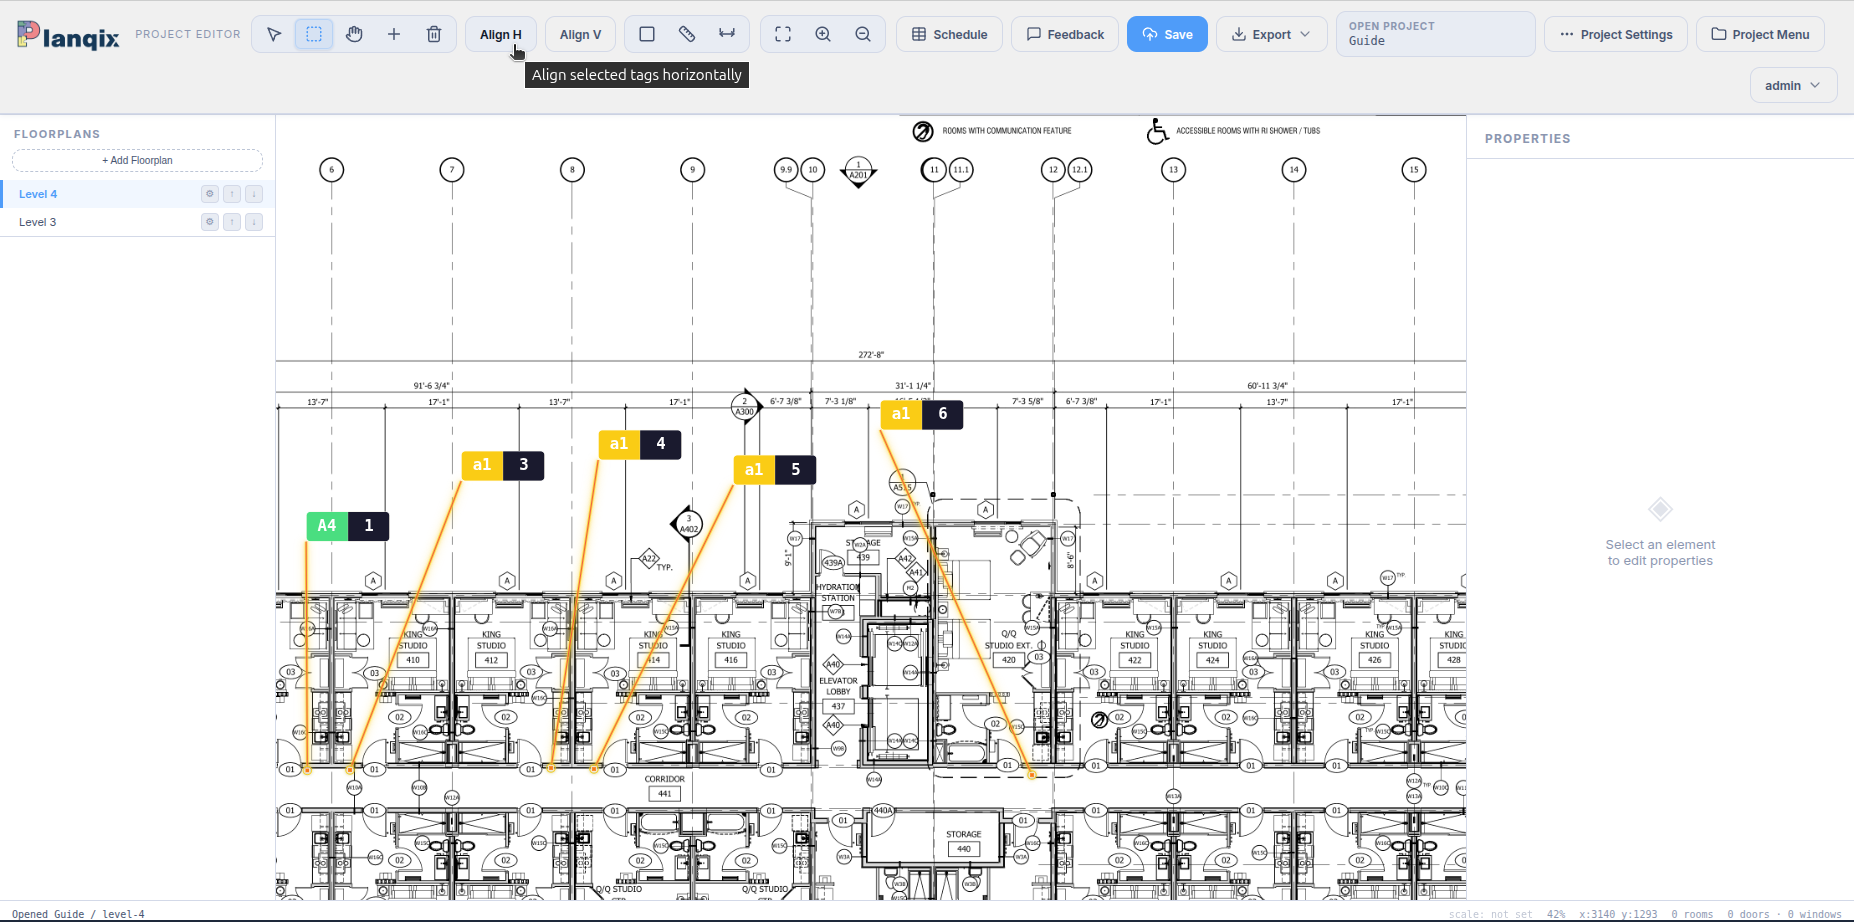
Align H / Align VThese two buttons only appear once you have two or more signs selected — they snap the selection into a straight horizontal or vertical line.
W/O (white-out)Paints over part of the background drawing — see White-out.
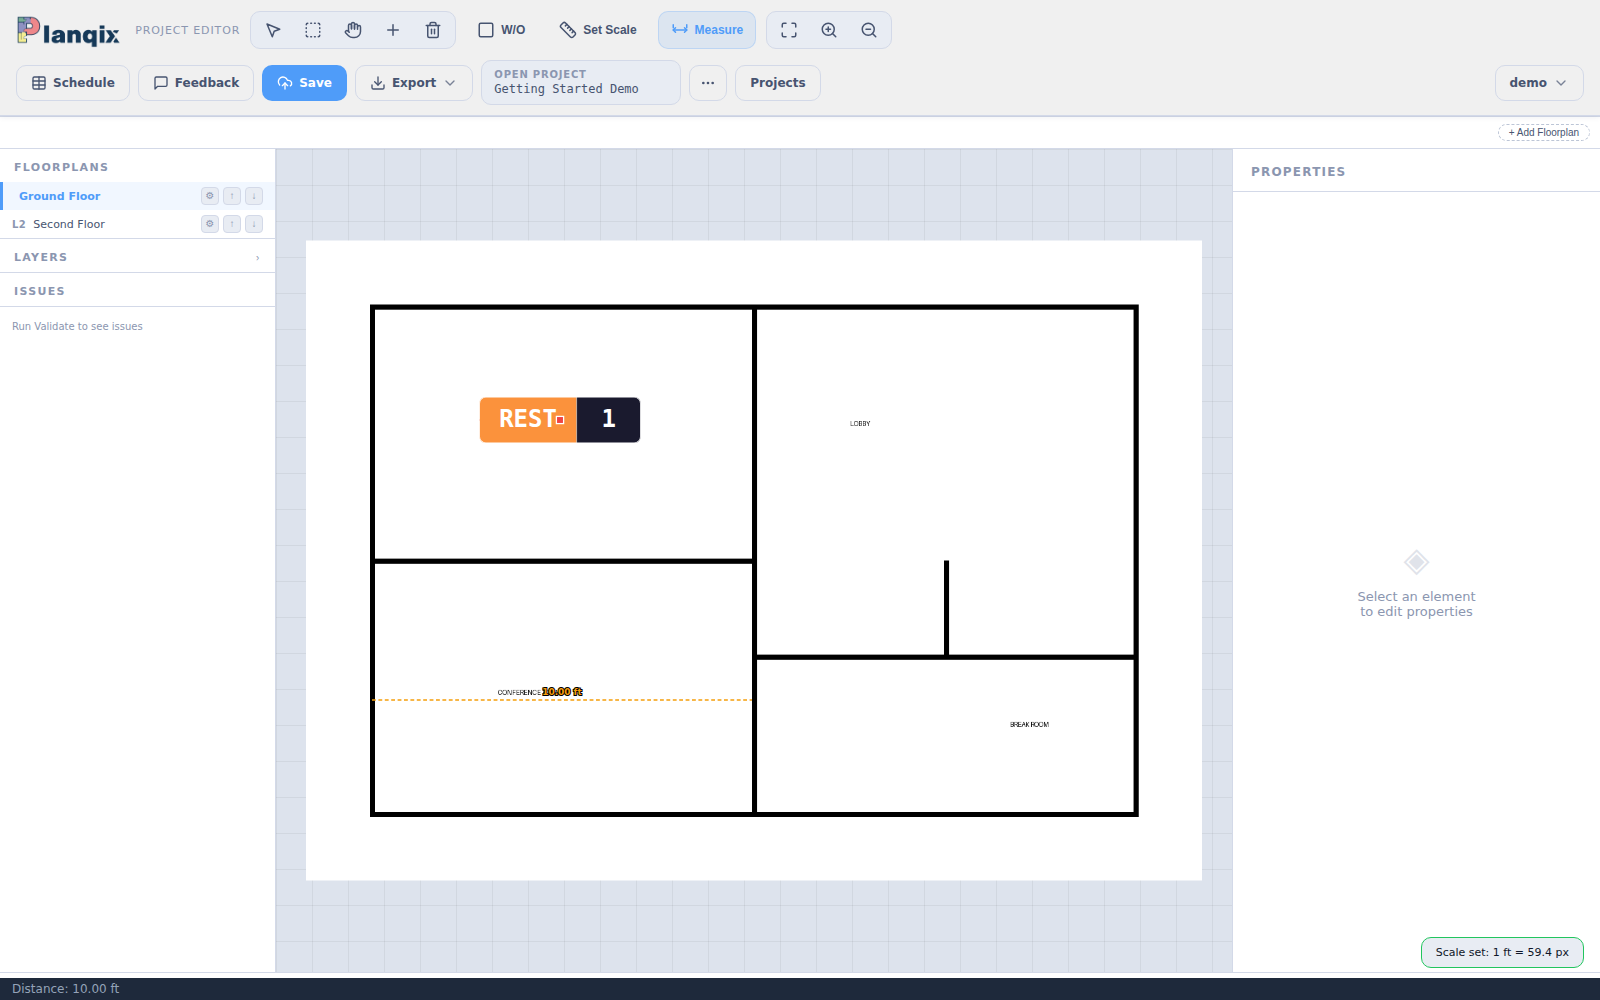
Set ScaleCalibrates real-world units against the drawing. Shortcut K — see Scale & measure.
MeasureReports the real-world distance between two points once a scale is set. Shortcut L.
FitFrames the whole plan in the window. Shortcut F.
Zoom inZooms in around the current view. Shortcut Ctrl+.
Zoom outZooms out. Shortcut Ctrl−. The mouse wheel zooms too.
ScheduleOpens the Message Schedule, and from there Quick Counts — see Quick Counts & schedule.
FeedbackSends a question, comment, or bug report straight to the Planqix team.
SaveSaves the project. Shortcut CtrlS — see Saving & undo.
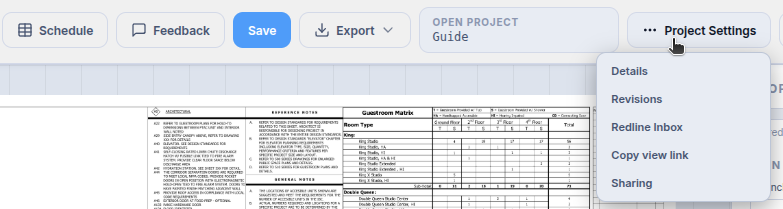
Project SettingsProject-level actions: Details, Revisions, Redline Inbox, Copy view link, Sharing and Title Block — plus the sheet tools Crop Floorplan, Resize Floorplan, Replace Source Image and Send to Install Team. See part 15 and 16.
Project MenuReopens the Projects window to create, open, or switch projects.
2
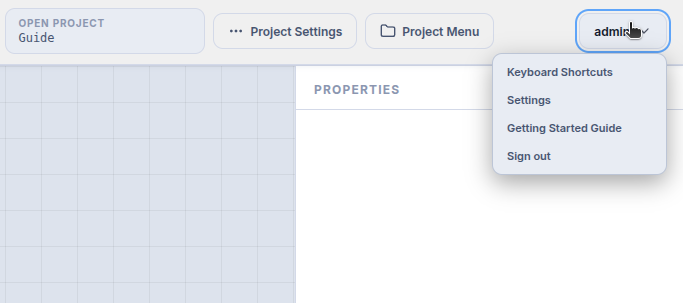
Click your username in the top-right corner for the account menu: Keyboard Shortcuts, Settings, Getting Started Guide (this page), and Sign out.
3
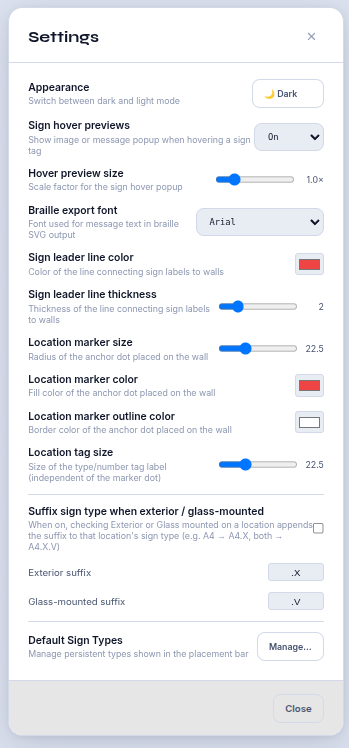
Choose Settings for app-wide preferences. These follow you between projects, and every one of them takes effect immediately:
AppearanceSwitches between dark and light mode.
Sign hover previewsWhen on, hovering a sign tag on the plan pops up that sign's artwork and message so you can check it without selecting it.
Hover preview sizeHow large that hover popup is, from 0.5× to 3×.
Braille export fontThe typeface used for message text in the Braille SVG export. The list is grouped into "Highly Recommended" and "Other Acceptable" — the recommended fonts are the ones that read cleanly at sign sizes and satisfy typical accessibility requirements.
Measurement unitsSwitches the measure and set-scale tools between Imperial (ft/in) and Metric (m/cm), and sets the unit room areas are shown in.
Project fontThe typeface this job's message text uses on the plan and in exports. It belongs to the project rather than the workstation — it overrides the Braille export font above for this project and travels inside the exported ZIP.
Default title blockUpload your office's title-block sheet once here and every project can use it without re-uploading (organizations set one shared default). Which sheet a given project actually uses is chosen per project under Project Settings → Title Block.
Sign leader line colorColour of the line that connects a sign's tag back to its location dot on the plan.
Sign leader line thicknessThickness of that same leader line, 0.5 to 8.
Location marker sizeRadius of the location dot placed on the plan, 6 to 60.
Location tag sizeSize of the type/number tag label, set independently of the dot — turn this up if tags are hard to read on a large sheet.
Snap signs to wallsWhile placing a sign, snaps its location dot to a nearby wall if one is within 15 pixels. Only appears if wall data exists for the sheet.
Suffix sign type when exterior / glass-mountedWhen on, ticking Exterior or Glass mounted on a sign automatically appends a suffix to its type — so A4 becomes A4.X, and a sign that's both becomes A4.X.V. The suffixed types are counted separately in the schedule, which is what you want when they're fabricated differently.
Exterior suffix / Glass-mounted suffixThe two text boxes below it let you change those suffixes from the defaults .X and .V to whatever your office uses.
Default Sign TypesClick Manage… to open your permanent sign types — covered next.
04
Set up permanent sign types
A sign type is a reusable category — "restroom", "exit", "A4" — with its own colour, artwork, and defaults. Set these up once and they're available in every project you open, which is what makes the fast first-pass markup possible.
1
Open Settings from the username menu and click Manage… next to Default Sign Types.
2
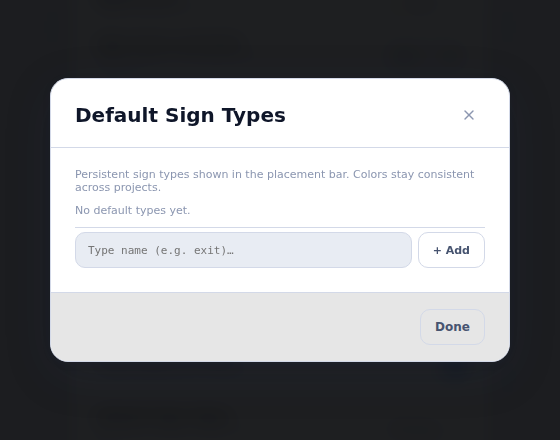
The Default Sign Types window opens — empty the first time. Type a name into the box at the bottom (for example restroom) and click + Add, or just press Enter.
3
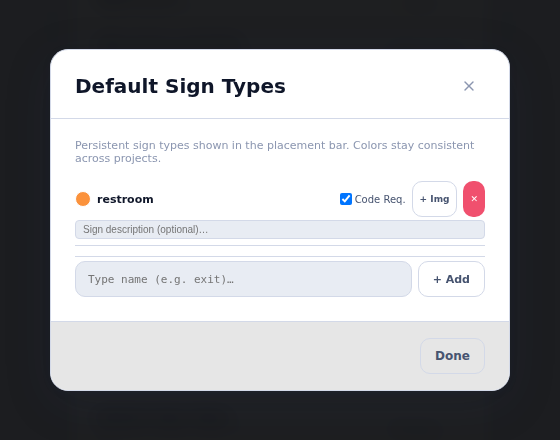
Planqix adds the type with an automatically assigned colour. Add as many as you need — one row per type. Click Done when finished, then Close to leave Settings.
4
Each row carries the full setup for that type. You can fill these in now, or leave them until the job is confirmed:
Colour dotClick it to pick the colour used for this type's tags on the plan. Keeping colours consistent makes a marked-up sheet readable at a glance.
Code Req.Whether new signs of this type are flagged as code-required by default. The schedule can filter on this — see Quick Counts & schedule.
+ ImgUploads the SVG artwork template for this type. Reads ↑ Img once one exists, and clicking again replaces it.
✎ DrawOpens this type's artwork in the built-in vector editor — draw a template from scratch or edit what's already there, without leaving Planqix. See Draw your own sign artwork. The same button appears on each row of the "This Project Only" list for project-specific types.
⊞ FieldAppears once artwork exists. Marks the rectangle on the artwork where message text and braille go — see Images, pictograms & braille.
▣ PictoAlso appears once artwork exists. Marks where a pictogram sits on the artwork.
✕Removes the type from your permanent list. Signs already placed keep their type.
DescriptionThe text box under each row. A shared, human-readable description ("Room ID, tactile + braille") that appears alongside the type in the placement bar and the schedule.
Two places, same settings. Everything here can also be reached from the Properties panel while a sign of that type is selected. Use whichever is closer to hand — they edit the same thing.
05
Add signs to your plan
This is the heart of the first pass. You can start dropping signs immediately — even before any permanent sign types exist. For estimating, a type and a position per location is all you need; messages and images come later.
1
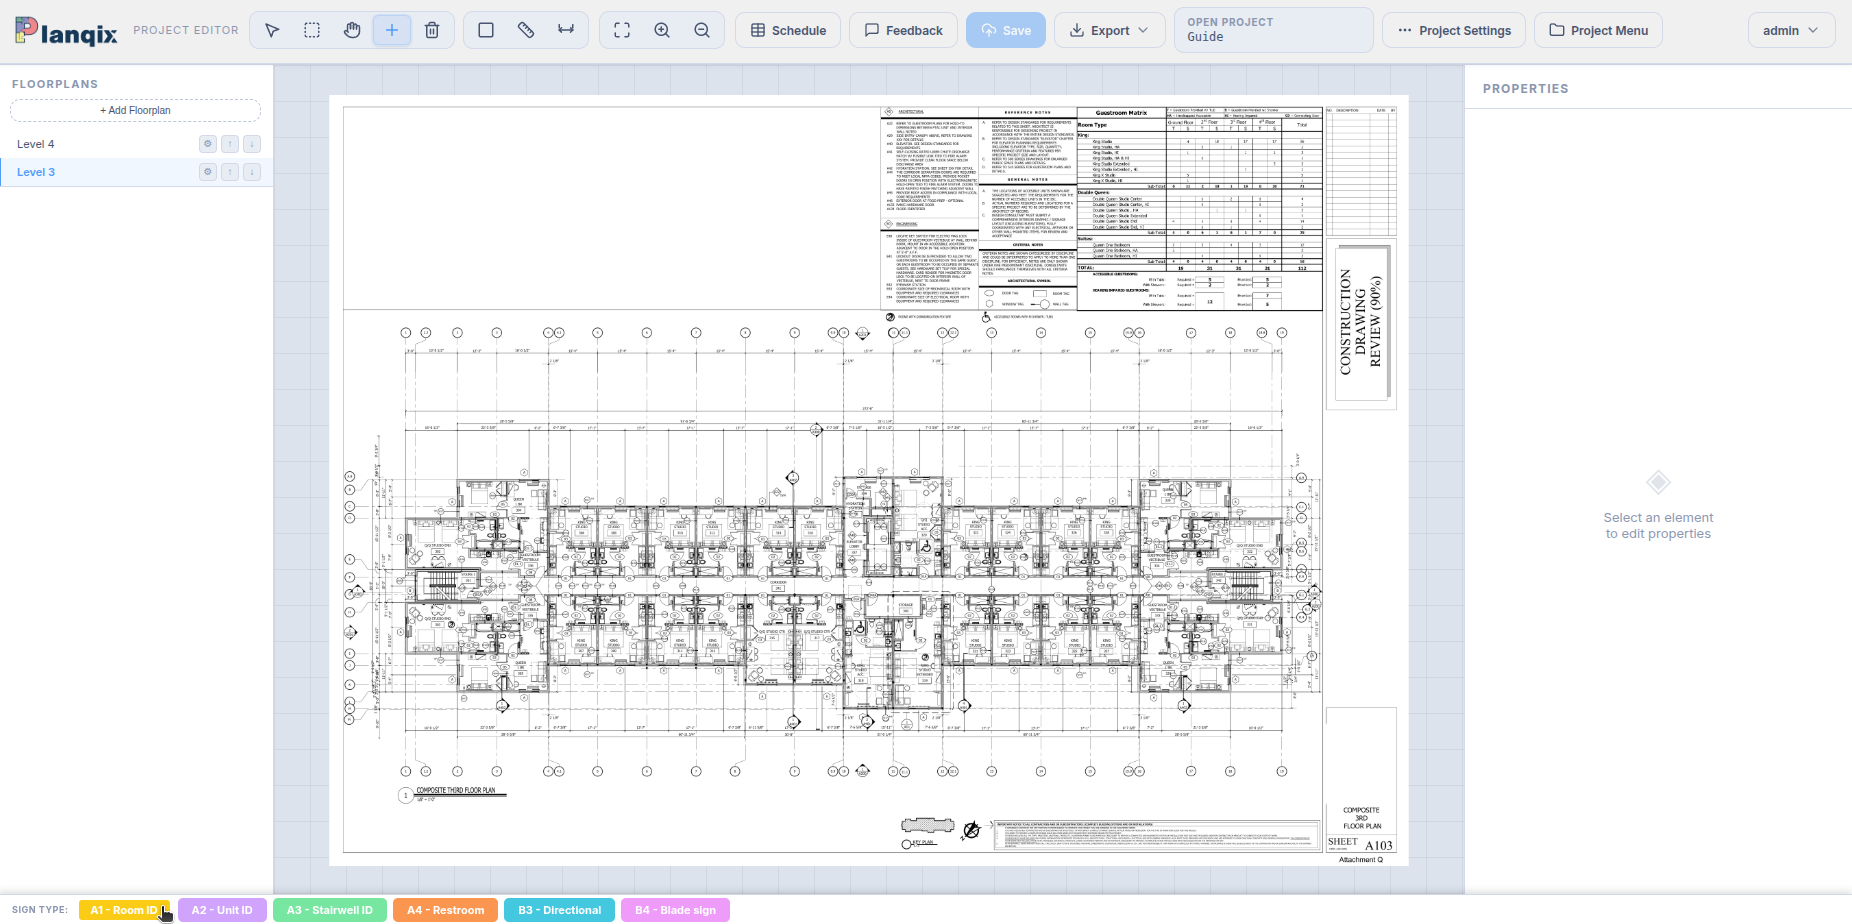
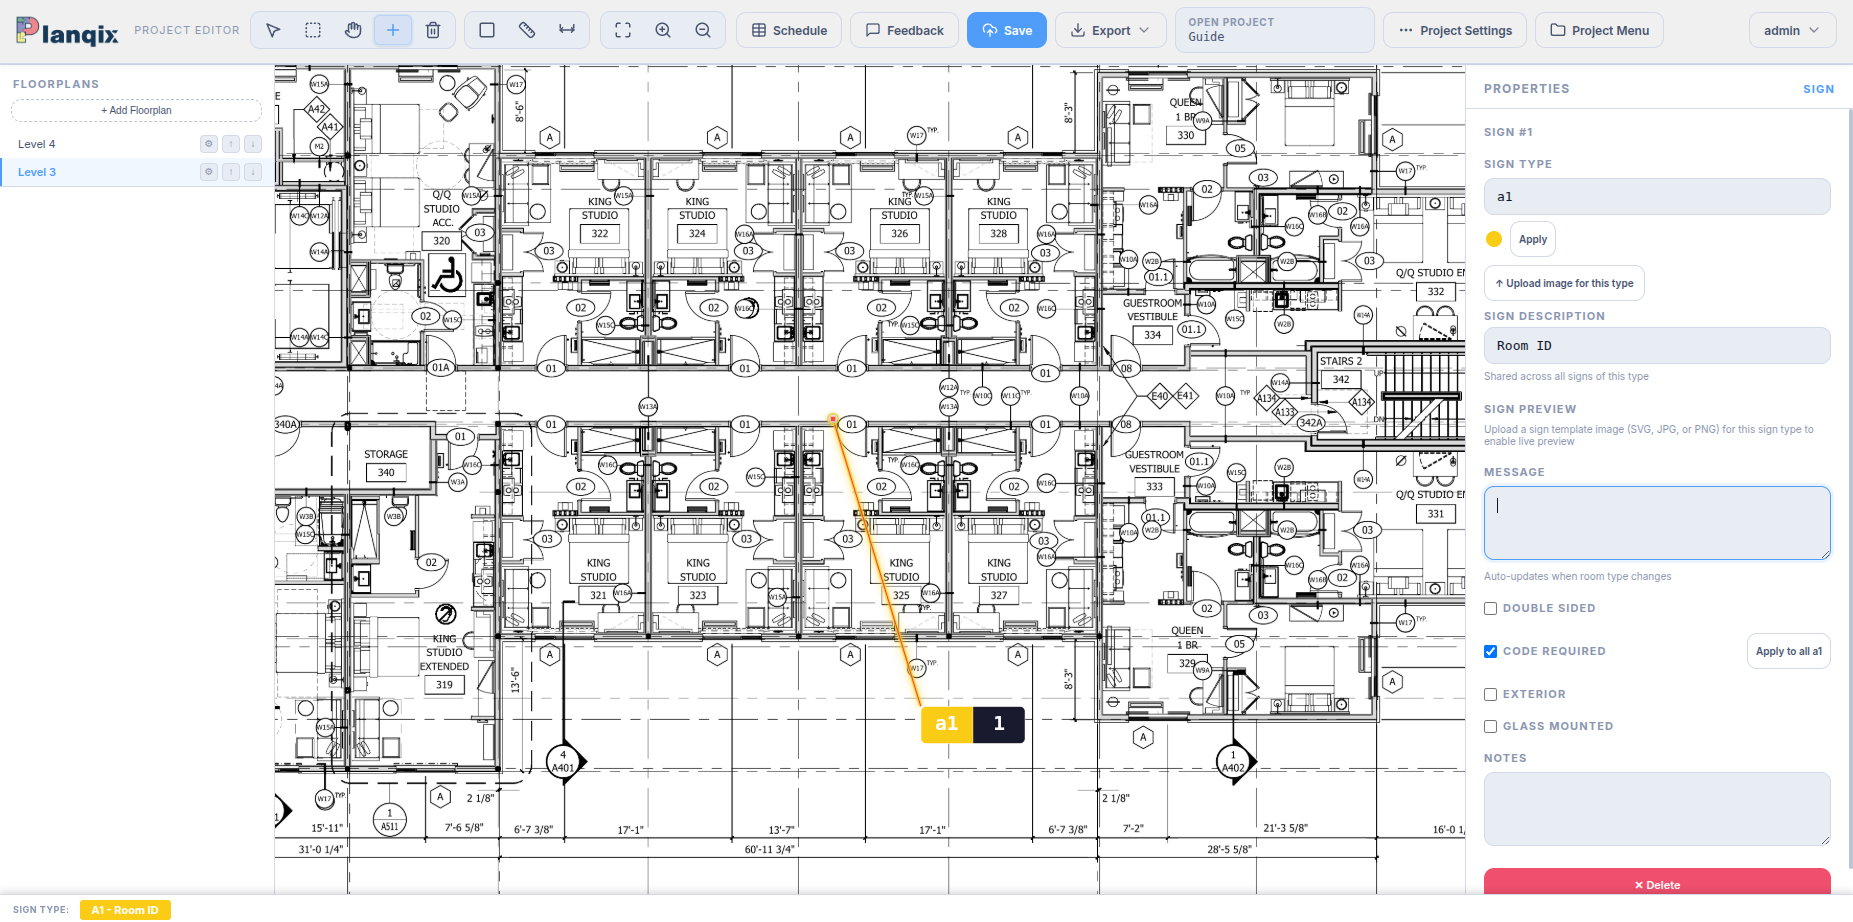
Click the + tool in the toolbar. A bar appears along the bottom of the screen listing your sign types — click the one you want to place, e.g. restroom. It stays selected, so you can place a run of the same type without reselecting. Clicking the highlighted type again deselects it.
2
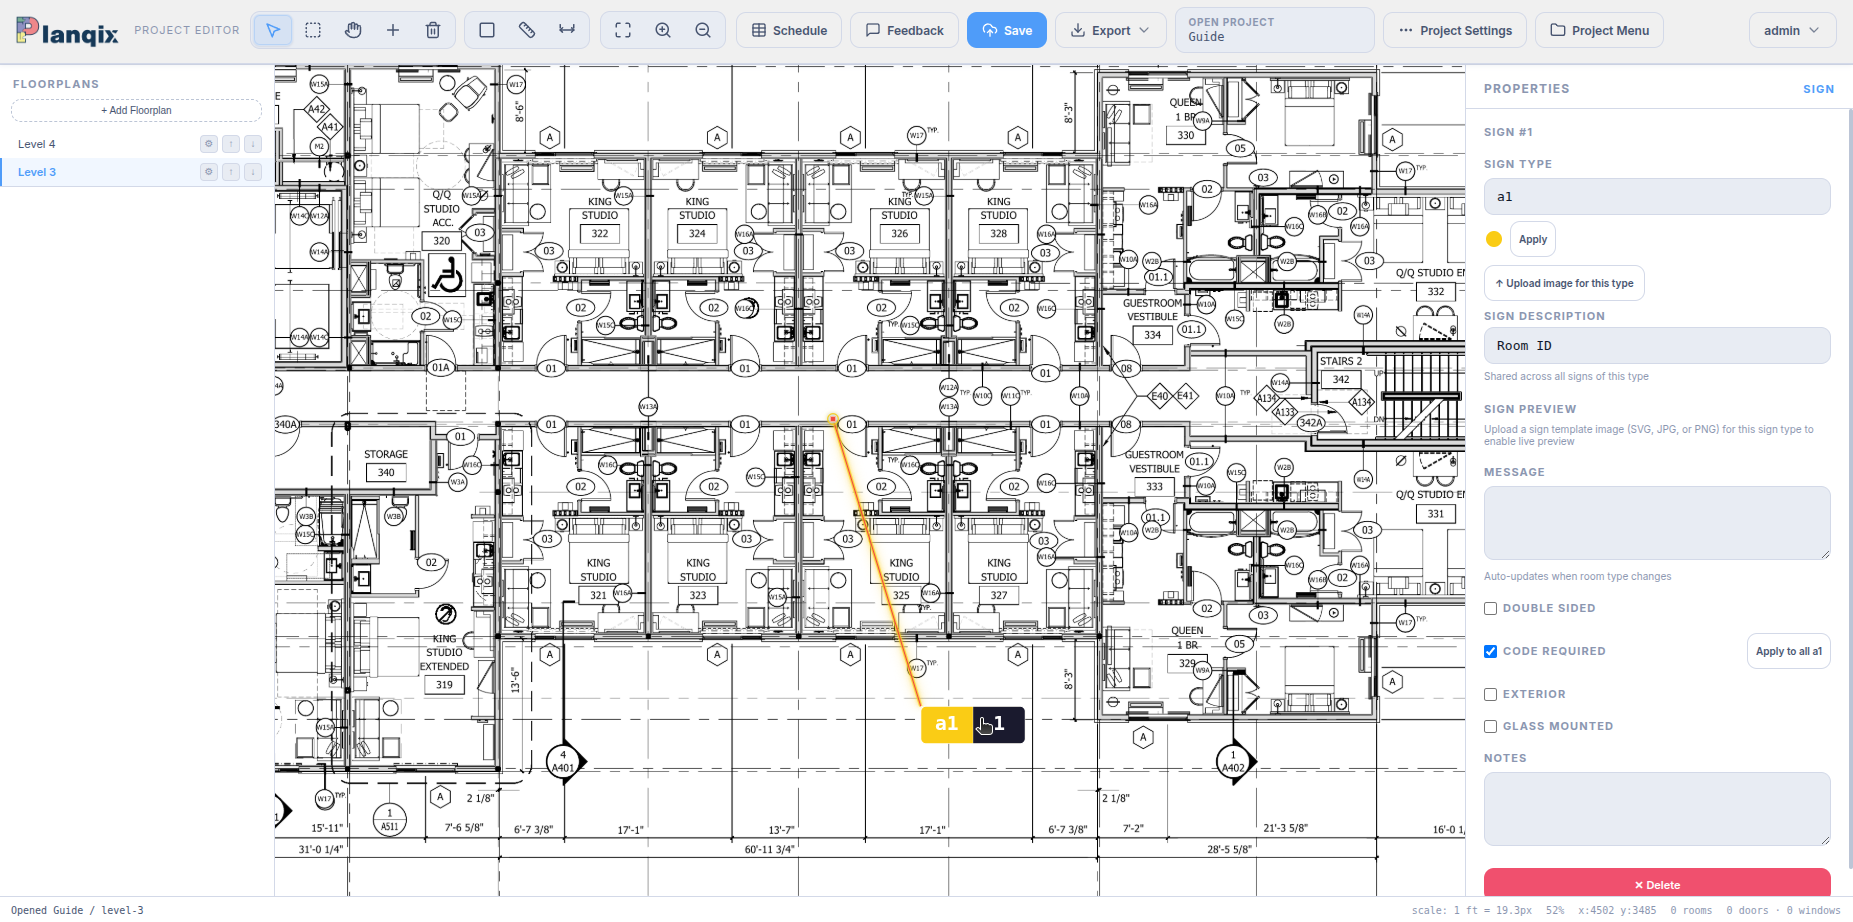
Placing a sign takes two clicks:
First clickSets the location — the dot on the plan marking where the sign physically goes.
Second clickDrops the tag — the coloured label. Between the two clicks the tag follows your cursor, so you can pull it into clear space and it stays connected to the dot by a leader line.
Press Esc between the two clicks to cancel and remove the sign.
3
Instead of clicking for the location, you can drag a rectangle on that first click. The location dot is placed at the centre and Planqix also records the sign's footprint — useful for larger signage like a directory or monument where the physical extent matters.
4
Signs are numbered automatically in the order you place them, starting at 1. The number shows on the tag and becomes the Sign # column in the schedule.
To reposition anything later, switch to the Select tool and drag: dragging the tag moves just the label, and dragging the location dot moves the sign's actual position. The leader line follows either way.
5
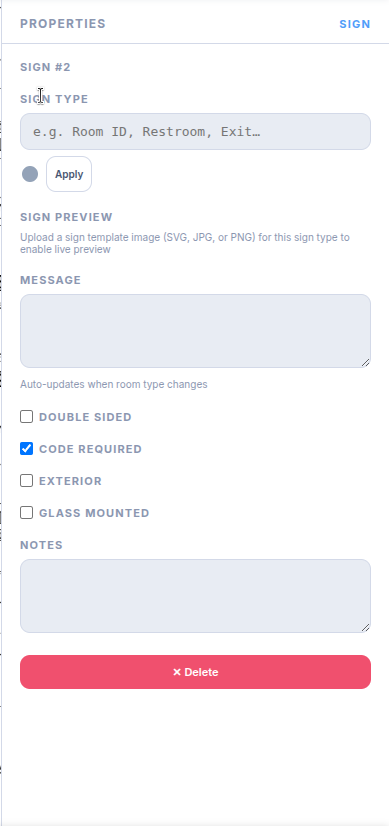
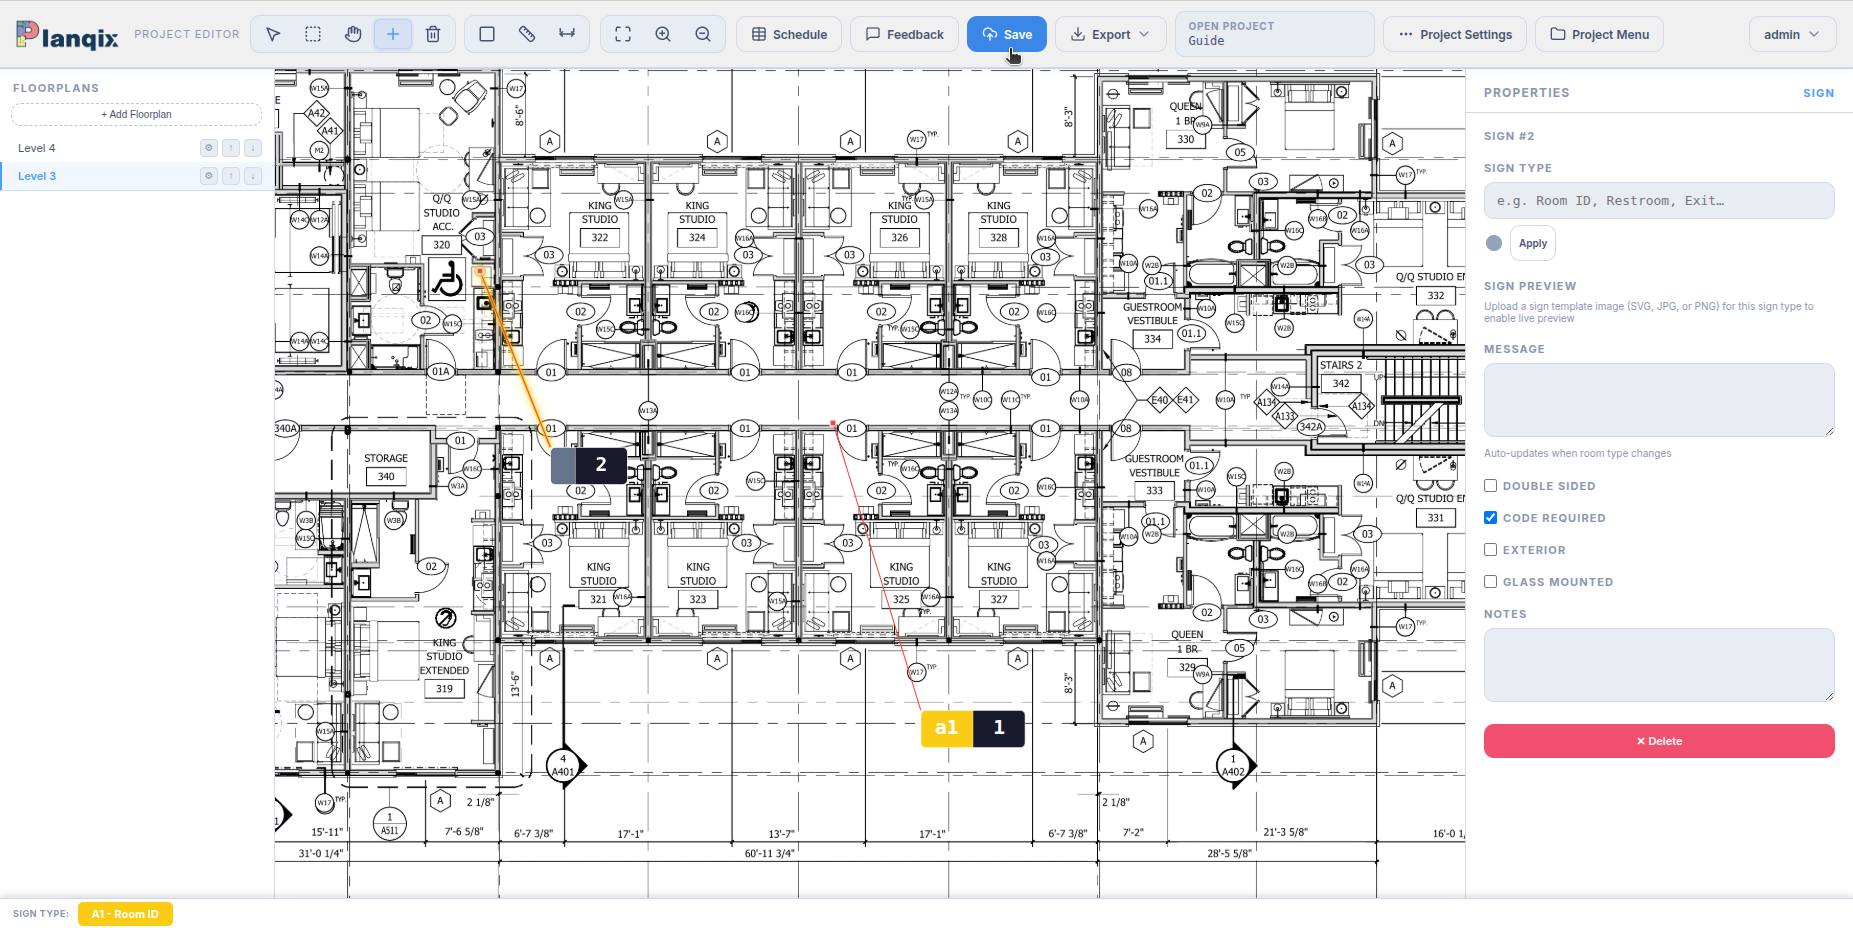
No permanent sign types yet? The bar just reads "No default types — add them in ⚙ Settings," but the + tool still works. Click the plan to drop a sign anyway; it's placed with no type.
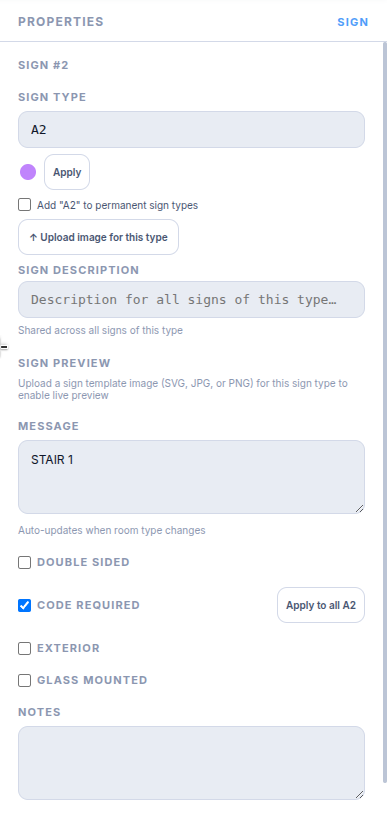
Select it, then type a name straight into the Sign Type field in the Properties panel. A dropdown suggests common categories — Unit Number, Room ID, Restroom, Stairwell ID, Exit, Wayfinding, Custom — but you can type anything, including your own codes like A4. A checkbox appears just below: Add "<type>" to permanent sign types. Tick it to save that type for reuse in this and every other project, exactly as if you'd added it in Settings.
6
The colour dot under the Sign Type field recolours the type on the fly: click the dot, pick a colour, then click Apply. If the type is one of your permanent types, the new colour is saved there too and follows it into every project.
06
Saving, undo & recovering work
Worth reading early: Planqix keeps a local safety net, but saving to the server is still a deliberate action you take.
1
Click Save in the toolbar — or press CtrlS — to store the project on the server. The button briefly changes to Saved to confirm.
2
CtrlZ undoes your last change and CtrlShiftZ (or CtrlY) redoes it. This covers placing, moving, retyping, and deleting signs.
3
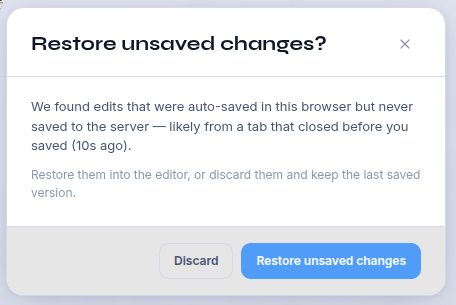
If you try to close the tab with unsaved changes, your browser warns you first. Separately, Planqix quietly snapshots your work to this browser about once a minute. If a tab ever closes before you saved, the next time you open that floor plan you'll be offered Restore unsaved changes — take it to recover the edits, or Discard to keep the last version that reached the server.
The local snapshot is tied to this browser on this computer. It's a crash safety net, not a substitute for saving — always click Save before you finish for the day.
Mark up & estimate
07
Work with multiple floor plans
Most jobs have more than one level. Each floor plan keeps its own drawing, signs, and scale, but they all roll up into one schedule and one set of counts.
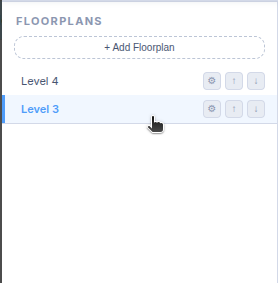
1
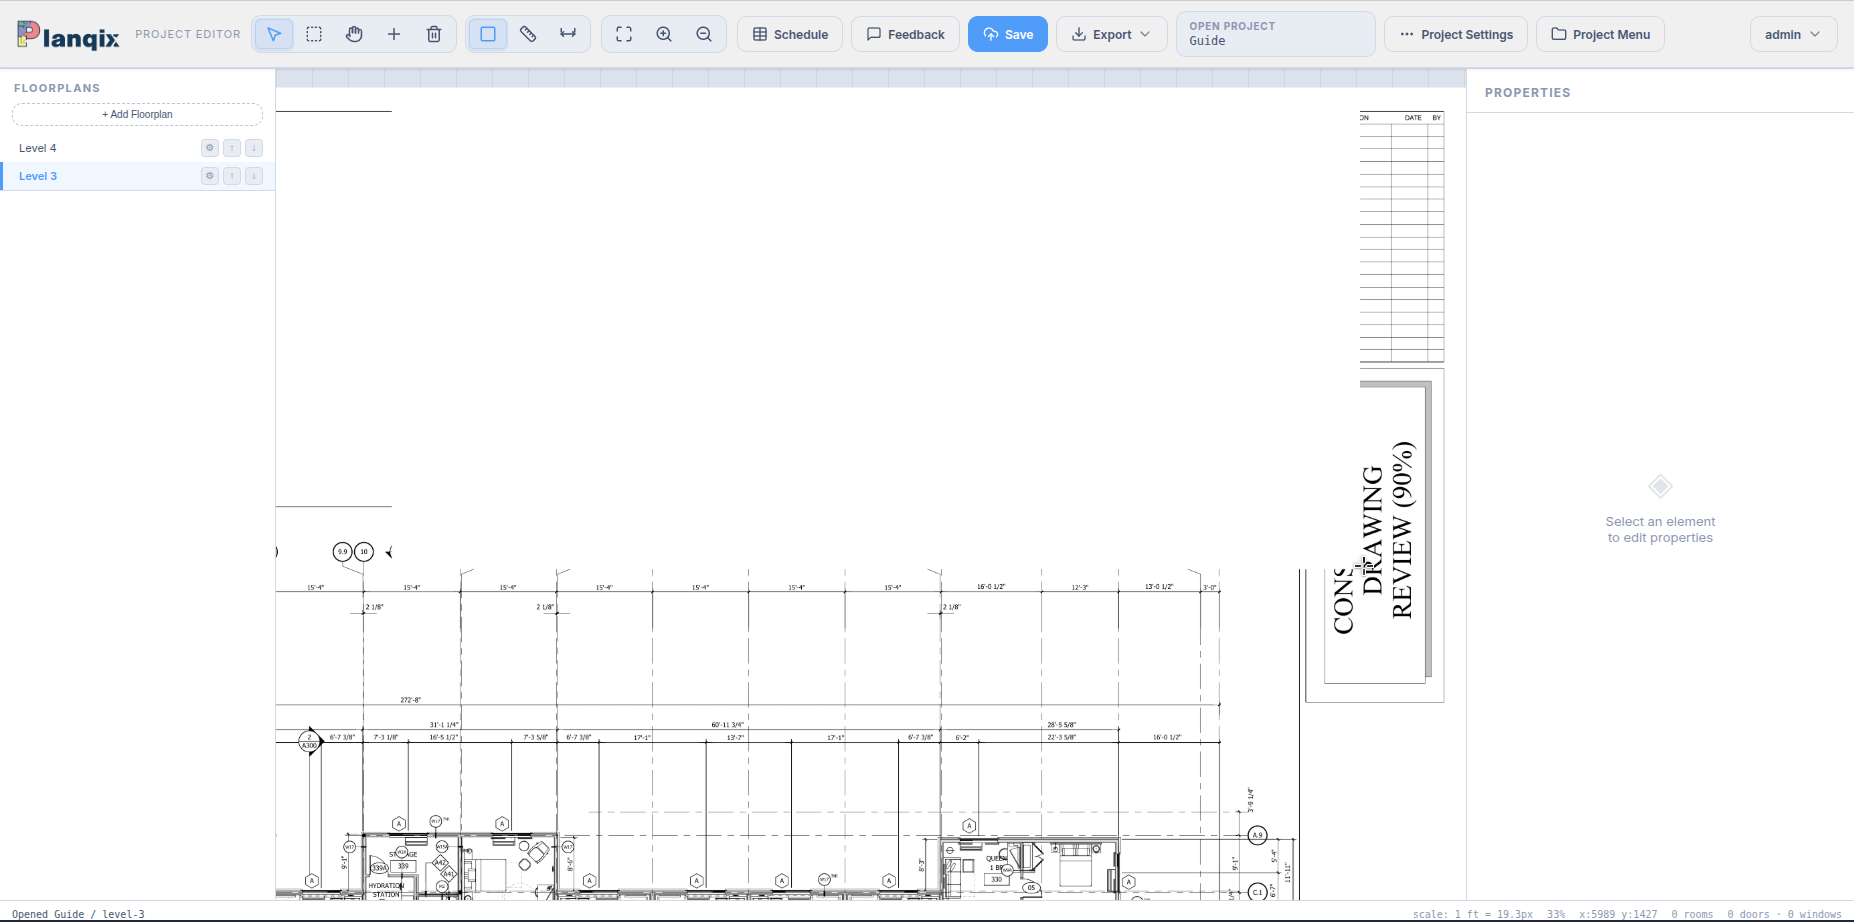
Click + Add Floorplan above the canvas to add another level. Fill in its Label, Level, and Area the same way as the first, and upload its drawing.
2
Every sheet appears both as a tab in the bar above the canvas and as a row in the Floorplans list on the left. Click either to switch. Sign numbering, scale, and white-outs are all per-sheet.
3
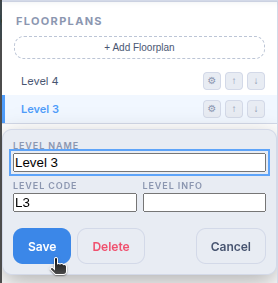
On each sidebar row, the gear icon renames the sheet or edits its level and area, and the up/down arrows reorder the list — worth doing so your sheets read in building order, since that order carries through to the schedule and exports.
08
Set the scale and measure distances
Setting a scale is completely optional and is only used for the measure tool.
1
Click Set Scale (or press K), then click two points spanning a distance you already know — a dimensioned wall, a standard door opening. A prompt asks for that real length; type it in (e.g. 10 ft) and confirm. The status bar then shows the scale instead of "not set."
2
With a scale set, click Measure (or press L) and click any two points — the distance between them is reported in real units. Press Esc to clear the measurement.
Scale is stored per floor plan, so set it on each sheet you need to make measurments on.
09
White-out
Paints over parts of the background drawing you don't want to show — title blocks, revision clouds, stray marks, or an old sign legend — so your exported sheets stay clean.
1
Click W/O in the toolbar, then drag a rectangle over anything you want to mask. Repeat for as many areas as you need, then switch back to the Select tool when you're done.
White-out only hides the background drawing — it never hides your signs, and it doesn't alter the file you uploaded.
10
Select, align & delete signs
Once a sheet has a few dozen signs on it, these are what keep the markup tidy and readable.
1
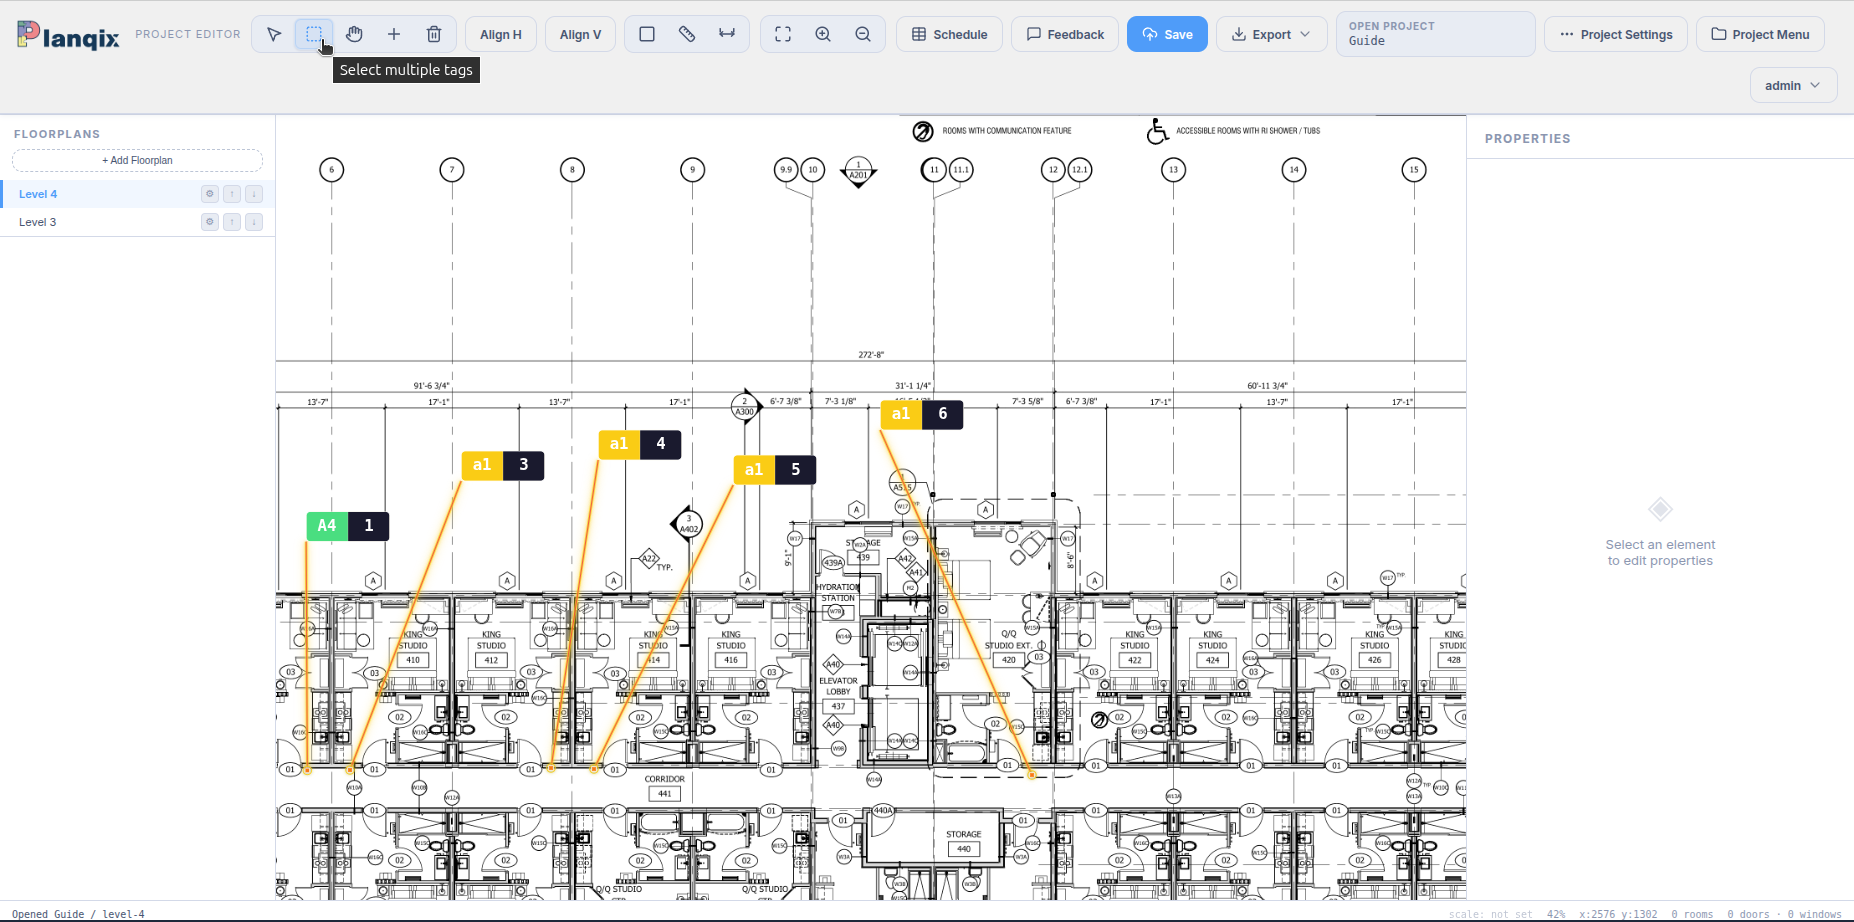
Click the dashed-box icon — Select multiple — then drag a box around several signs to select them all at once.
2
With more than one sign selected, Align H and Align V appear in the toolbar — click one to snap the selected tags into a straight line. Dragging any tag in a multi-selection moves the whole group together.
3
To remove signs, select them and click the trash icon (or press Del). If you delete something by mistake, CtrlZ brings it back.
11
Quick Counts & schedule
The estimating checkpoint. With every location marked and typed, these two views roll up the whole project — across all floor plans — without needing a single message or image.
1
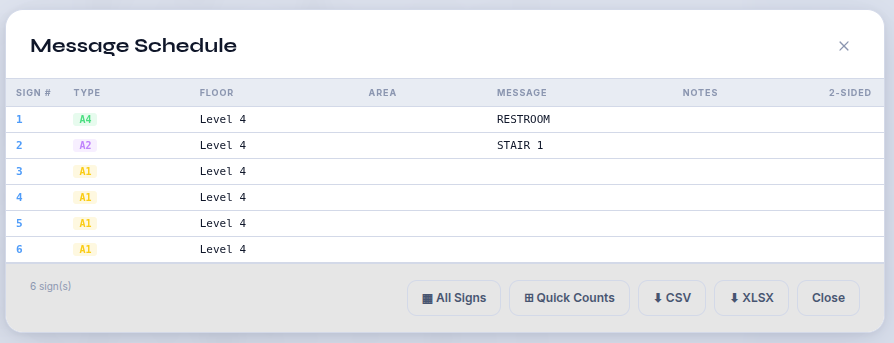
Click Schedule in the toolbar for a spreadsheet-style list of every sign in the project: Sign #, Type, Floor, Area, Message, Notes, and 2-Sided. On a first pass the message column is simply blank. Click any column header to sort by it.
2
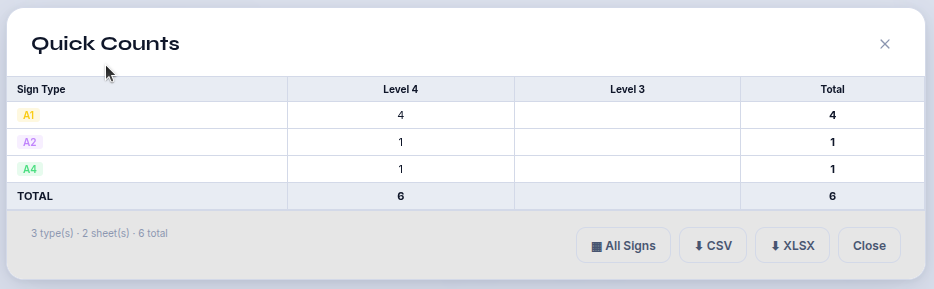
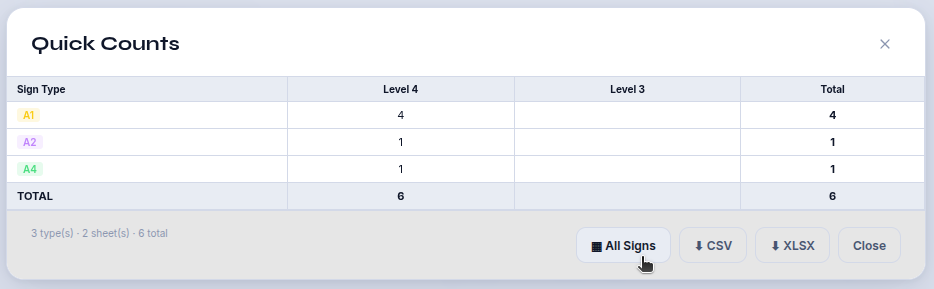
Click Quick Counts at the bottom of the Schedule for the summary you'll actually estimate from: how many signs of each type exist, broken down by floor, with totals.
3
The filter button at the bottom cycles through three views — ▦ All Signs, ✓ Code Only, and ✗ No Code — using each sign's Code Required setting. This is how you separate code-mandated signage from optional wayfinding when pricing. The filter applies to the Schedule and Quick Counts together.
4
Both views export straight to ⬇ CSV or ⬇ XLSX for your estimate or proposal — and whatever filter is active is what gets exported.
Schedule round-trip.⬆ Import Edits applies an edited schedule back onto the project: export the CSV or XLSX, have it corrected off-line, then import it again. Rows match by their ID column and updates only — nothing is ever deleted, so uploading a corrected subset of rows is safe.
If the job doesn't move forward, you can stop here. If it does, carry on below.
If the job moves forward
12
Add messages to signs
Every sign carries its own message — the words that sign will display — separate from its type and artwork. This is usually the first thing you fill in once a job is confirmed.
1
With a sign selected, find the Message box in the Properties panel and type the text the sign should show. It saves as you go.
2
Two keys make filling in a whole schedule fast:
EnterSaves the message and jumps straight to the next sign's message box, selecting that sign on the plan as it goes. It wraps from the last sign back to the first, so you can work through an entire floor without touching the mouse.
Alt + EnterInserts a line break inside the message instead of advancing — use it for multi-line copy. ShiftEnter does the same thing.
3
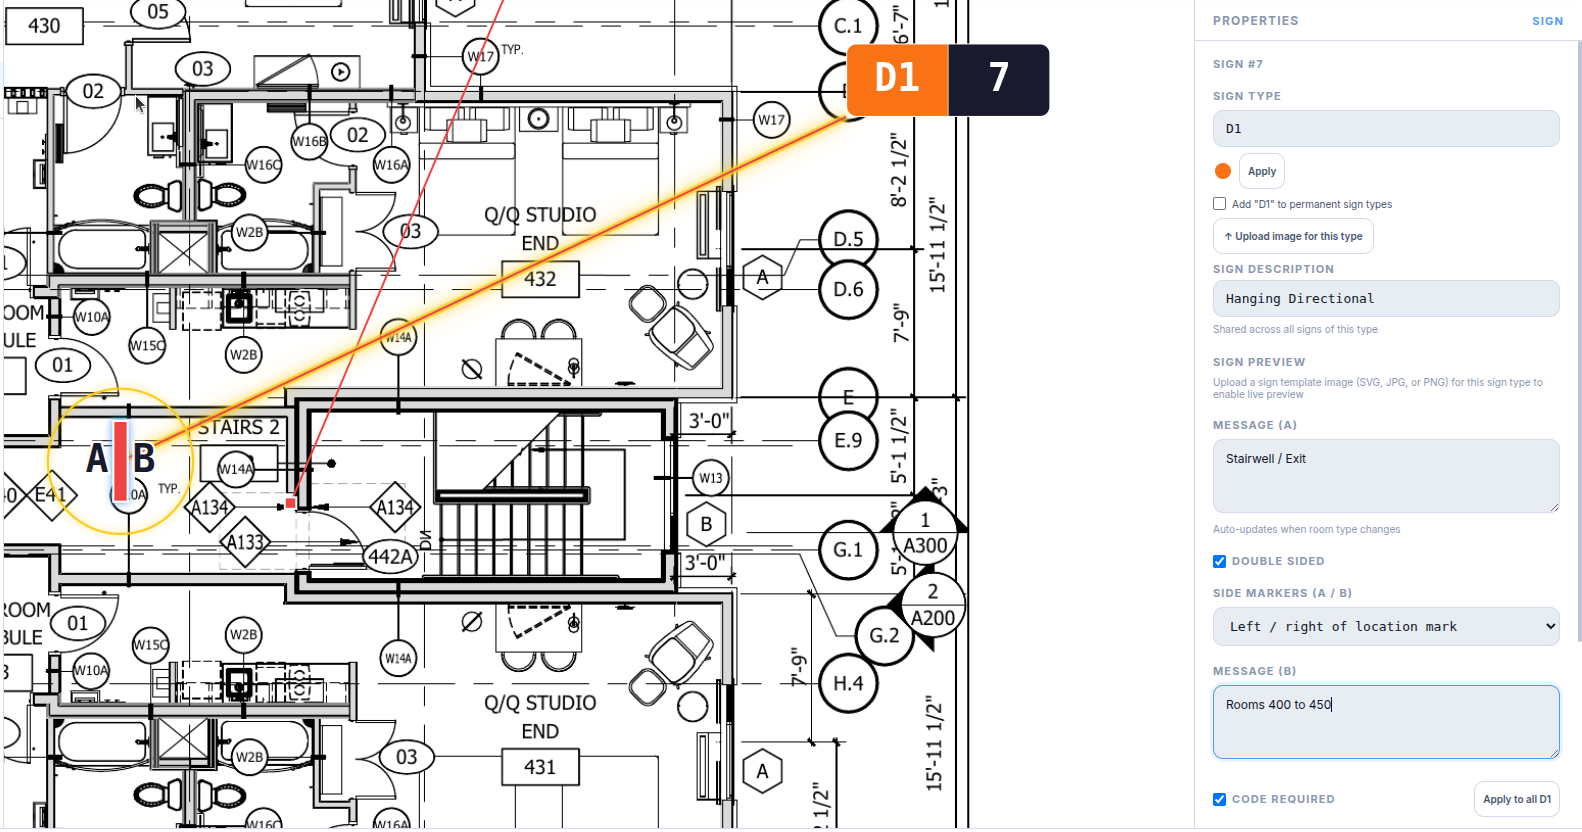
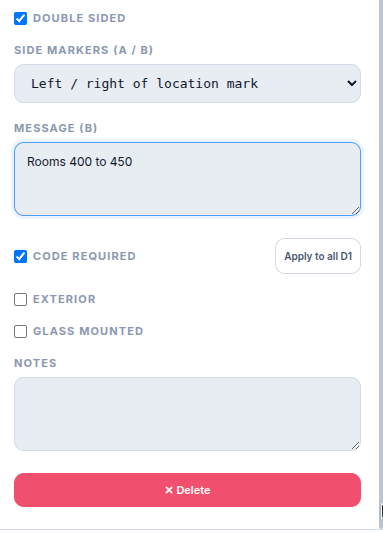
Tick Double sided when a sign is read from both faces — a ceiling-hung or projecting blade sign, for instance, where someone approaching from either direction needs to read it. Two things then appear:
Side markers (A / B)Sets whether the A and B labels sit left/right or top/bottom of the location dot on the plan. Pick whichever matches how the sign actually faces, so the installer can tell which face is which.
Message (B)The text for the second face. The original Message box is relabelled Message (A). Pressing Enter in the A box moves you to the B box before moving on to the next sign.
The preview then shows both faces side by side, and the schedule's 2-Sided column flags the sign so it's priced and fabricated correctly.
4
Below the message boxes are three tick boxes and a notes field that drive the schedule and pricing:
Code RequiredMarks the sign as code-mandated rather than optional. Drives the ✓ Code Only / ✗ No Code filter. It is set per location, so you can tick or untick any single sign — see the step below for how the default is decided and how to apply one answer to a whole type at once.
ExteriorMarks the sign as outdoors — usually a different substrate. With the suffix setting on, this also appends .X to its type so it counts separately.
Glass mountedMarks the sign as mounted on glass, which normally means a second backing panel. Appends .V the same way.
NotesFree text for anything you want to track internally — mounting height, a query for the architect. It appears in the schedule but never on the printed sign.
5
Code Required, in detail. The tick box belongs to the individual sign location, not to the type — two Room ID signs on the same floor can disagree, which is what you want when one door is a code-mandated exit and the next is a store cupboard.
What a new location starts as is decided in this order:
1. The type's project settingWhatever you last applied with the Apply to all button described below, for this project.
2. The permanent sign typeOtherwise, the Code Required tick against that type in ⚙ Settings → Default Sign Types. Set a permanent type to code there and every location you place with it arrives already ticked.
3. TickedIf the type is neither, Planqix assumes code required — the safer default to price against.
Whichever way it starts, you can always tick or untick a single location afterwards and it stays that way. Editing that sign's message or notes will no longer quietly reset it.
6
Applying one answer to a whole sign type. Next to the tick box is an Apply to all <type> button. Set the current sign how you want it, then click the button: every sign of that type in the project is set to match — ticked or unticked, whichever the current sign is — and that becomes the type's default, so locations you place later with the same type arrive marked the same way.
Use it when a whole type turns out to be optional signage you don't want in the code count, or when the reverse is true and the type needs to be code across the board. It is a single undo step if you change your mind.
Scope.Apply to all affects this project only — it will not change the same sign type in your other jobs. To change the starting point for every future project, edit the type in ⚙ Settings → Default Sign Types instead.
7
Higher up the panel, Sign Description is shared by every sign of the type — a one-line explanation like "Room identification, tactile + braille" that shows up next to the type in the placement bar and helps whoever reads the schedule later.
8
Flagged locations. A location Planqix is unhappy with is drawn on the plan with a red dashed cloud around its tag. Three things earn one:
TBD copyThe message or the sign type still reads "TBD" — a placeholder that has not been answered yet.
Copy or braille off the edgeThe message, at the copy height set for the type, would print past the edge of the sign. Shorten the copy, add a line break, or make the sign bigger.
Something raised in the pictogram fieldTactile copy or braille falls inside the pictogram's required 6″ field — see Images, pictograms & braille.
The Flagged panel in the left sidebar counts them and, set to Flagged only, hides every clean sign so the plan shows just the ones left to fix. It is a view filter like the Code and Sign Types controls beside it — the schedule, the counts and every export still contain every sign. Set it back to All signs (or press CLEAR) when you're done.
13
Images, pictograms & braille
Artwork is attached to the sign type, not to individual signs — upload it once and every sign of that type picks it up, then composes its own message, braille, and optionally a pictogram on top. Because the artwork is attached to each sign type, you will not be able to upload artwork until a sign type is set. Don't have artwork yet? The built-in editor can draw it with you — see Draw your own sign artwork.
1
With a sign selected, click ↑ Upload image for this type in the Properties panel and choose your artwork (SVG, JPG, or PNG — SVG gives the cleanest result and the most accurate sizing). Every sign of that type updates at once.
2
Four different uploads live in the Properties panel's Artwork & images section, and they mean four different things. The Properties panel keeps the buttons and leaves the explaining to here:
Image for this typeThe template every sign of the type shares. Message text, braille and pictograms are composed on top of it, per sign.
Image for this locationUse this when one sign needs a finished drawing instead of the type's template plus dynamic text. It applies to that location only, and nothing is composed over it — the drawing is the sign. Remove it to fall back to the type's template.
Back (B) imageAppears once a sign is marked double-sided. Until you upload one, both faces show the same drawing; upload a back image only if the two sides actually differ. It must be the same proportions as the front, because the copy areas are percentages of the sign face and both faces share them.
Reference sheetAn extra drawing for the crew — a mounting elevation, a bracket detail, a spec sheet. It is never printed on the sign and nothing is composed onto it, so it is held to no particular shape. Installers reach it by swiping past the sign faces in the Install App.
The rest of this part is about the first one, the type's template.
3
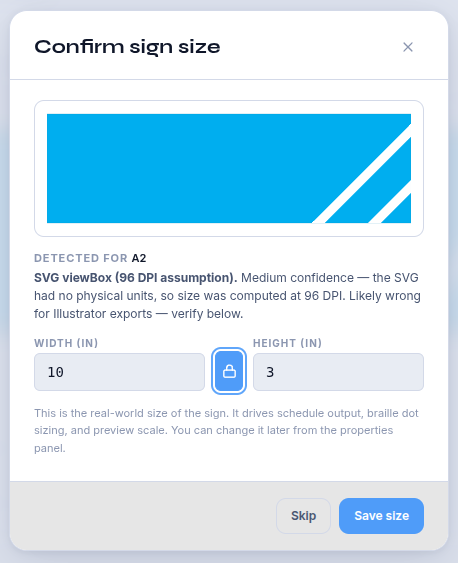
Planqix reads the artwork's real-world size and asks you to confirm it. Check the numbers — the dialog tells you how confident it is and where the size came from, and an SVG exported from Illustrator often needs correcting. The padlock keeps the aspect ratio locked while you type. Click Save size.
This size matters: it drives the schedule, the printed dimensions, the braille dot spacing, and the preview scale. You can change it any time from the small width × height boxes next to Sign Preview.
4
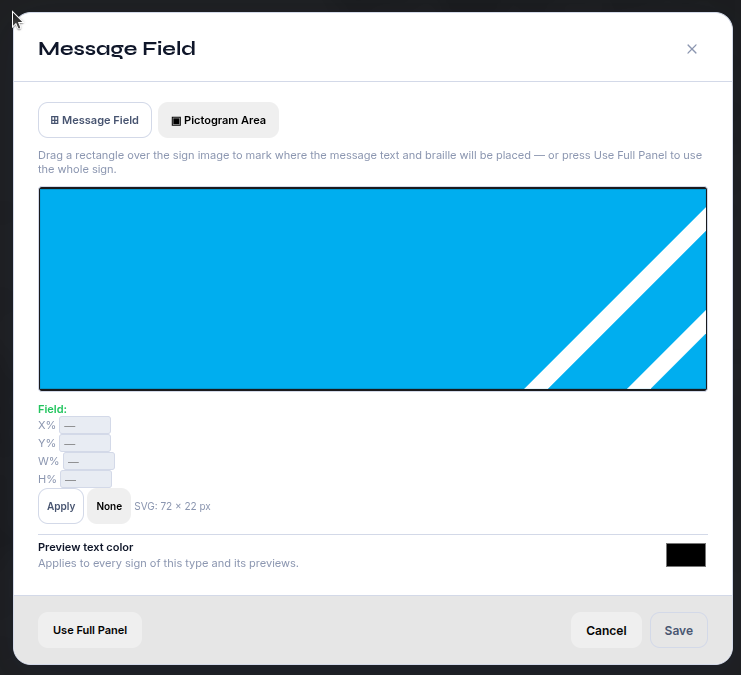
Straight after upload the preview shows the bare artwork — no message text yet, because Planqix doesn't know where on the artwork the message belongs. Click Set Message Field.
SVG shortcut: bring your text boxes with you. If the file already contains layers named text.line1, text.line2, ada.line1 or pictogram1, this whole step is skipped — Planqix reads those names during upload, turns each one into the matching field (copy area, tactile area, or pictogram slot), and removes the placeholder boxes so they never print. Every sign of the type renders its message and braille immediately, and you never need to drag a message field by hand. See part 14 for how to prepare a template like this in Illustrator or Inkscape.
5
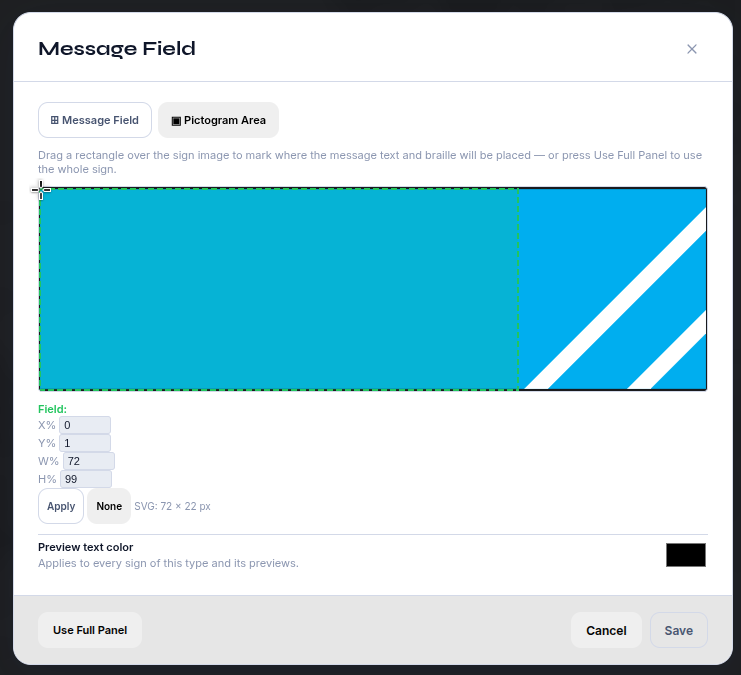
In the picker that opens, drag a rectangle over the area where message text should sit. Fine-tune with the X% / Y% / W% / H% boxes and Apply if you need it exact, set the Preview text color to match your artwork, then click Save.
If the message area is simply the whole sign, skip the dragging entirely — click Use Full Panel in the footer and then Save.
6
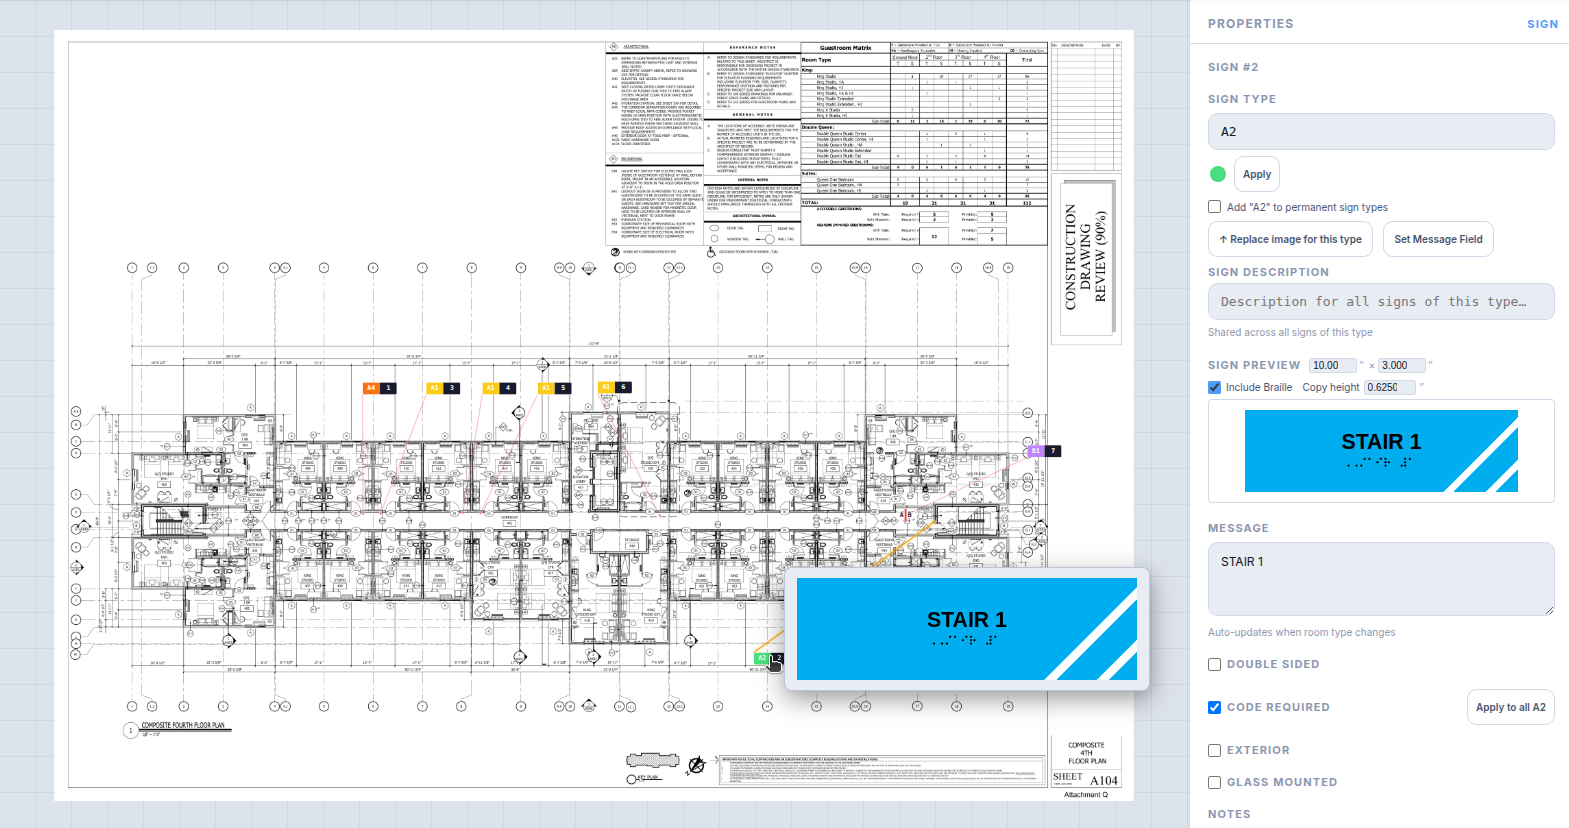
As soon as that field exists, every sign of the type renders its own message inside it — and Planqix automatically translates each message into Unified English Braille and draws the dot pattern beneath the text. There is no separate braille step and nothing to type twice: change a message and its braille updates with it.
7
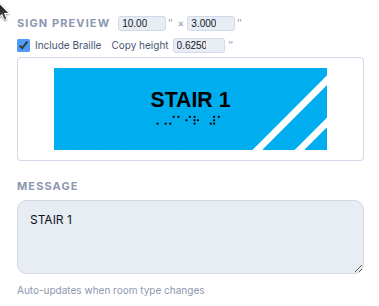
Two controls just above the preview tune how that renders, per sign type:
Include BrailleUntick for signs that don't need it — a directory, a projecting blade sign, anything above reach range.
Copy heightThe height of the message text in inches (default 0.625″). Tactile signage usually has a required range, so set this to whatever your specification calls for and the braille scales with it.
8
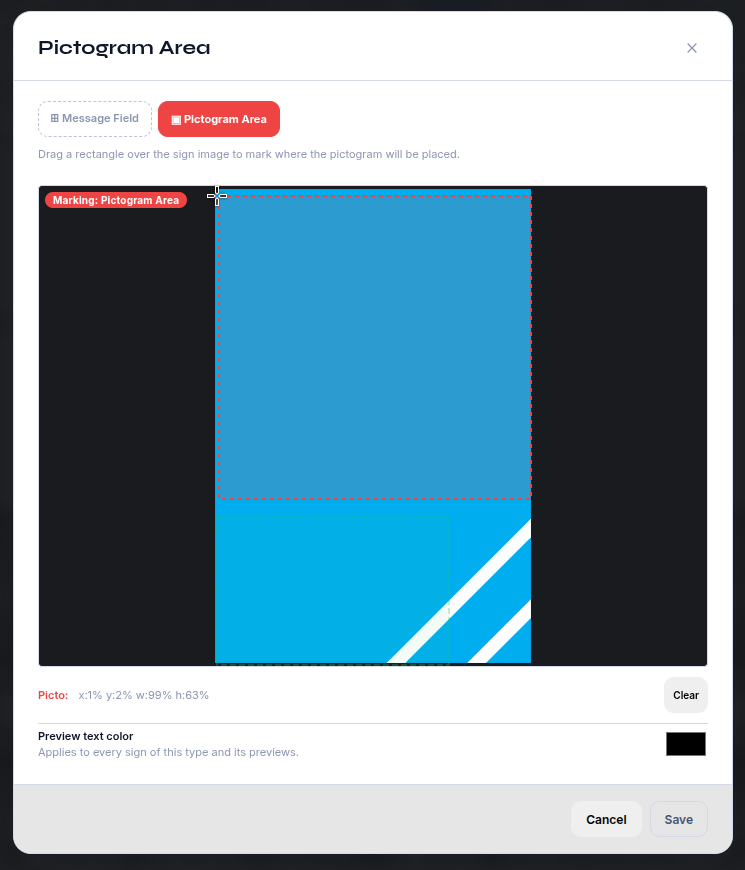
To add a pictogram, reopen the picker with Set Message Field and switch to the ▣ Pictogram Area tab. Drag a rectangle where the pictogram belongs — typically the upper panel of a restroom or accessibility sign — and click Save.
The 6″ pictogram field. ADA 703.6.1 requires a pictogram to sit in a field at least 6″ high, and that field must contain no other raised elements — no tactile copy, no braille. Leave the full 6″ × 6″ clear even when the symbol itself is smaller: the field is the clear space, not the artwork. Planqix checks this for you and flags any location whose 6″ field would overlap tactile copy or braille (see the Flagged filter), so a long message that pushes copy up into the field shows up as an error rather than reaching the shop.
9
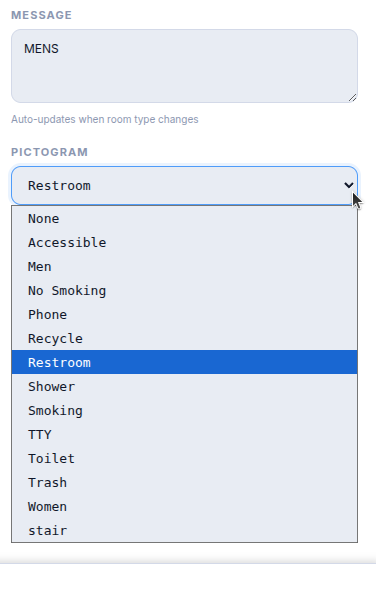
A Pictogram dropdown now appears in the Properties panel — it only shows up once a pictogram area is defined for that sign type. Pick from the built-in set (restroom, accessible, men, women, toilet, shower, phone, TTY, stairs, recycle, trash, smoking, no smoking) or choose None. It drops into the area you marked.
Uploading your own pictogram. Custom symbols are added per project under Project Details → Pictograms → Upload SVG, and they are then offered in this dropdown alongside the built-in set. Draw the symbol on a 6″ × 6″ field — make the artboard 6″ square and place the symbol inside it, rather than cropping tight to the symbol. That is the field ADA 703.6.1 asks for, and drawing it in means the symbol lands at the right size and with the right clear space wherever the pictogram area is placed, instead of being scaled to whatever the crop happened to be.
10
The preview now shows the finished sign: artwork, pictogram, message, and braille composed together. Click it to open it full size and check it properly. Then click Save in the toolbar.
Shortcut. The Use Full Panel button in the picker's footer sets the message field to the whole sign in one click, so you don't have to drag a rectangle around the edges. Use it for types where the entire artwork is the message area — a plain plate with no fixed logo, border or pictogram to work around. The green rectangle jumps to 0–100% in both directions; press Save to apply it like any other field. (The button appears on the ▤ Message Field tab only — a pictogram area is always square, so it can never be the full panel.)
14
Draw your own sign artwork
Every sign type needs artwork, but you don't need Illustrator to make it. Planqix ships a built-in vector editor that opens straight onto a sign type — draw a simple template, drop in a logo, mark where the message and braille go, and save. It lands on the type exactly as if you had uploaded the file by hand.
1
In Settings → Default Sign Types, click ✎ Draw on the type's row. (Project-specific types work the same way — use the Draw button on their rows in the This Project Only list.) The editor opens full-screen with that type's current artwork loaded — an uploaded SVG comes in as fully editable shapes, and an uploaded PNG or JPG opens as a picture fitted to the sheet that you can trace over, crop, or resize — or a blank sheet if there isn't anything yet.
The Sheet boxes in the top bar are the finished sign's size, and you can change them at any point — the artwork keeps its position, so making the sheet taller adds room around the drawing rather than stretching it. A blank sheet starts at the type's own recorded dimensions, or at 11″ × 17″ when the type has never been sized. The units dropdown beside them switches every size field in the editor between inches, millimetres and centimetres.
2
Draw with the tools in the left panel:
Select ⬉Click a shape to select it; drag to move; drag its corner handles to resize. Select several at once with Shift-click, or drag a rubber-band rectangle across empty space to catch everything it touches. Shapes that were grouped select together — Alt-click picks one member of a group on its own. Shortcut V.
Line ╱Drag to draw a straight line. Hold Shift to snap to 45° angles. Shortcut L.
Rectangle ▭ / Ellipse ◯Drag out the shape; hold Shift for a perfect square or circle. Shortcuts R and E.
Text AClick where the label should sit and type the wording in the right panel. This is plain printed text that belongs to the artwork itself — unlike the dashed text.lineN areas, it never gets overwritten by message copy. Drag its handles to change the font size. Shortcut T.
⛓ JoinSelect two or more lines and click Join to weld them into one closed outline — handy for tracing a badge or blade-sign profile.
⧉ DupDuplicates the selection, nudged down-right, ready to reposition.
▣ Group / ▢ UngroupWith several shapes selected, Group welds them into one object that selects, moves, and resizes together (Ctrl G, Ungroup is Ctrl Shift G). Duplicating a group keeps it grouped.
Ctrl Z / Ctrl Shift Z undo and redo, Del deletes the selection, and the − / Fit / + buttons zoom the sheet.
3
The Named areas buttons are the important ones for signage. + Text area stamps a layer named text.lineN marking where message copy prints; tick tactile first to stamp its raised-twin partner ada.lineN instead (numbered alongside the text lines), and + Pictogram area stamps a pictogramN slot. After saving, these are exactly the areas the schedule fills in — the dashed cyan boxes themselves never print.
4
The measurement dropdown in the top bar switches every size field between inches, millimetres, and centimetres. With a shape selected the right panel shows its exact X / Y / W / H in that unit — type new numbers to resize or reposition it precisely. The panel also styles the shape: a solid fill, a two-colour gradient at any angle, no fill, a stroke colour and width, and an optional drop shadow. The Layers list above it shows every layer top-first — toggle visibility, lock, reorder, or delete; clicking a layer's name selects everything on it; + Add layer creates your own empty artwork layer so you can keep logos, borders, and backgrounds organised (new drawing lands on the topmost unlocked layer).
5
To place a logo or photo, click 🖼 Image… and choose a PNG, JPG, or SVG. It lands centred on the sheet at its natural size (photos larger than the sheet are scaled to fit). Type exact W / H numbers in the properties panel — with lock aspect ratio ticked, changing one keeps the other in proportion.
To rework artwork that was drawn in Illustrator, Inkscape, or any other design tool, use ⤿ Import SVG… — covered properly in the next step.
6
Importing artwork from another tool. Click ⤿ Import SVG… and pick an .svg file. The file's layers are added on top of whatever is currently open — start from a blank sheet if you want a clean import. The sheet takes its size from the imported file's canvas.
Most of a typical template arrives fully editable:
ShapesRectangles, ellipses/circles, lines, polygons, and straight-line paths all become native objects you can select, measure, and restyle.
Fills & effectsSolid fills, two-colour gradients, drop shadows, and clip masks are rebuilt natively.
TextText boxes become real, editable text shapes — multi-line text survives, along with font size and bold.
Embedded imagesLogos and photos placed in the source file come across as movable, resizable, croppable images.
The restAnything Planqix doesn't model — curved Bézier paths above all — is carried through untouched: it prints and saves exactly right, it just isn't hand-editable afterwards.
7
Name your text boxes before you export. This is the part that saves real time: name the layers or groups that mark copy, tactile, and pictogram positions using the template convention, and Planqix picks them up automatically — during import, and again when the saved file lands on the sign type:
text.line1, text.line2 …Where message copy prints. One area per line of copy — a two-line sign gets text.line1 and text.line2.
ada.line1, ada.line2 …The raised-tactile twin of the matching text line — ada.line3 pairs with text.line3. The braille dots render inside these.
pictogram1, pictogram2 …Symbol slots, filled from the Pictogram dropdown (part 13). picto1 works too.
The names are forgiving about formatting: case doesn't matter and separators fold, so TEXT_LINE_1, Line 1, line.2, Pictogram-1 and ada line3 all match. The name can sit on the layer's name (the Illustrator Layers panel, or Inkscape's layer label) or on a group's id. An empty named group still comes through — as a placeholder box you drag into position and resize like any other shape.
Why bother? With the names in place, everything in part 13's "Set Message Field" steps happens by itself — no dragging fields by hand, and every sign composes its own copy and braille the moment the artwork lands on the type. Very old templates sometimes carry a braille1-style layer instead: it's recognised and stripped out, but it seeds nothing — rename it to ada.lineN.
8
A clip mask crops one shape to another. Select the mask shape first, then shift-click the shapes to crop (an imported image works perfectly as the cropped shape), then click Mask › Apply clip to selection. The mask is consumed into the crop — everything outside it disappears, which is how you trim a photo to a circle or fit a logo inside a border. The topmost drawable shape in the selection always acts as the mask.
9
Click Save and the artwork is written straight back onto the sign type — same as uploading a file, so the size confirmation and field seeding kick in as described in Images, pictograms & braille. If your import carried named text boxes (step 7), they seed the copy and pictogram areas automatically; otherwise mark the areas afterwards with the Named areas buttons or Set Message Field. Cancel closes without touching anything. If you opened the editor without a specific type (from a browser console or a future menu entry), Save downloads the SVG instead.
Bringing artwork in from elsewhere. Existing templates round-trip cleanly: simple shapes stay editable, gradients/shadows/masks are rebuilt natively, and anything exotic (curved paths, embedded raster art) is carried through untouched so nothing is lost between edits.
Delivering the job
15
Export your project
Export produces the files you hand off to fabrication, to the client, or into your own archive. Planqix saves any pending changes first, so exports always match what's on screen.
1
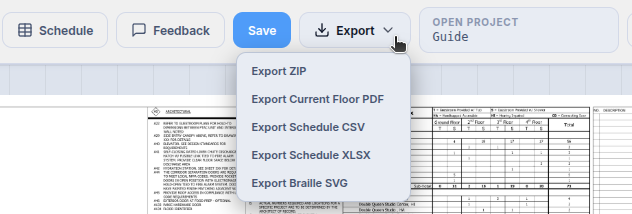
Click Export in the toolbar and pick a format:
Export ZIPThe complete project — every floor plan, all sign data, and artwork. This is the archive format, and it's what the Projects window's drop zone imports.
Export Schedule CSVThe sign schedule as plain CSV, for a spreadsheet or an estimating system.
Export Schedule XLSXThe same schedule as a formatted Excel workbook.
Export Floorplan PDFJust this floor as a layered PDF — the plan image with sign locations and tags drawn on top — without the rest of the project ZIP. Available once the sheet has been through AI processing.
Export Braille SVGProduction artwork for the whole project — each sign as vector art with its message and braille laid out, ready for a router or engraver. Uses the Braille export font from Settings.
The two schedule exports respect whatever filter is active in the Schedule window — so you can hand over a code-only list without editing anything.
16
Project details & revisions
The Project Settings menu holds project-level actions, separate from the floor-plan editing you've been doing so far.
1
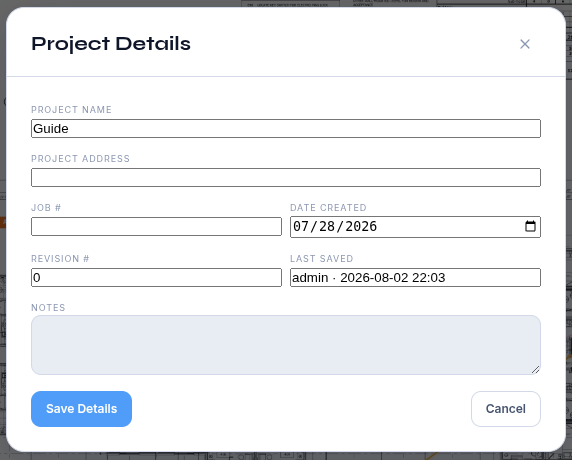
Open the menu and choose Details to record the job's identifying information: Project Name, Project Address, Job #, Date Created, and general Notes. The Revision # and Last Saved fields fill in automatically. Click Save Details when done.
2
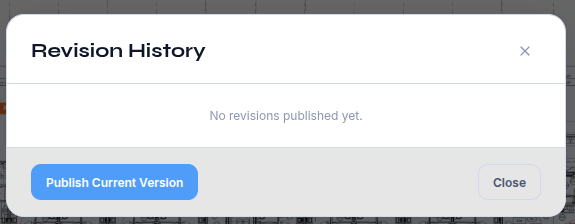
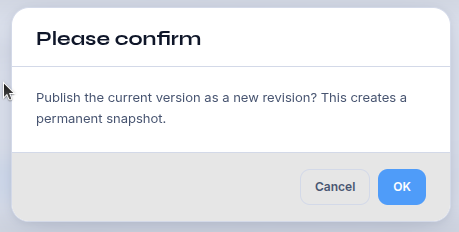
Choose Revisions to publish a permanent snapshot of the project as it stands. Do this right before sending a set out, so you always have a dated record of exactly what was issued and can point back to it if the scope is questioned later. Click Publish Current Version and confirm.
Publishing a revision is also what people you share with will see — sharing shows the latest published snapshot, not your in-progress edits.
3
Choose Title Block to pick which title-block sheet this project exports with: your account's default, a sheet uploaded just for this project, or none at all.
4
Three tools clean up the source drawing itself:
Crop FloorplanTrims margins or stray detail off the edges of the sheet.
Resize FloorplanScales the drawing up or down — for a scan that came in at the wrong size relative to its real-world dimensions.
Replace Source ImageSwaps in a cleaner scan or a revised drawing while keeping the work you've already done.
Signs follow the drawing. Locations move with the sheet through all three operations, so you can tidy the source at any point without re-marking the plan.
5
Send to Install Team is the hand-off to the installable app described in part 18. It publishes the current state as a numbered version and puts the job on the crew's app — and only jobs you send appear there, so the crew's list stays short. You keep editing the plan afterwards; when you want the crew on your latest changes, press the same button again (now labelled Start New Version) to publish a new version. Recall from install team takes the job back off their app. Photos and notes from site keep flowing throughout.
17
Sharing & reviewing redlines
Sharing lets a client, architect, or colleague open the project in a read-only Viewer — and, if you allow it, mark it up and send changes back for your approval.
1
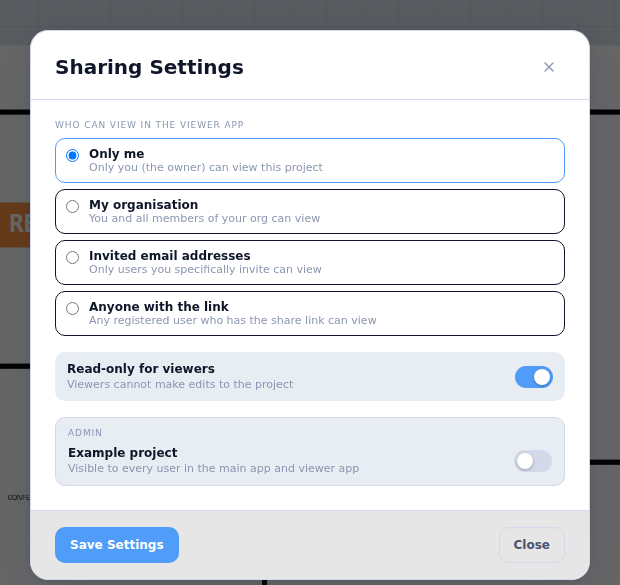
From Project Settings, choose Sharing, then pick who can view it:
Only meNobody else can open it. This is the default.
My organisationEveryone in your organisation can view it.
Invited email addressesOnly the specific people you invite. An Invite by email box appears — enter an address and click Send invite.
Anyone with the linkAny signed-in user who has the link. A Share link section appears: Generate link, Copy, and Revoke link to cut off access for everyone using it.
The Read-only for viewers toggle decides the rest: leave it on and viewers can only look; turn it off and they can propose changes back to you. Click Save Settings.
2
Copy view link in the same menu grabs the project's view URL in one click, ready to paste into an email.
3
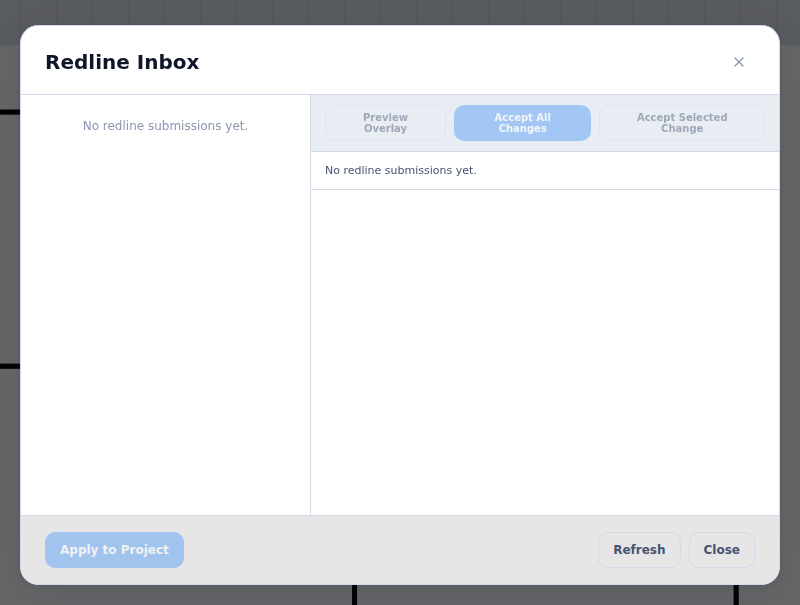
When viewers can propose changes, they get review tools in the Viewer — selecting signs, proposing new ones, flagging deletions, and pinning notes on the sheet. None of it touches your project. Their submissions — redlines — collect in Redline Inbox.
4
Open the inbox to work through them. Pick a submission on the left, then use Preview Overlay to see the proposed changes drawn over your plan before committing to anything. From there you can Accept Selected Change one at a time, or Accept All Changes to take the whole submission. Nothing is applied to your live project until you accept it.
18
What recipients see
You'll hand links to clients, architects and colleagues all the time, so it helps to know their side. A recipient never needs a licence or a paid plan — they open the Viewer in a browser and see the latest published revision of the project, not your work-in-progress.
1
Getting in. How they arrive depends on the sharing option you picked (part 16): an invited recipient opens their email link and signs in with that address; anyone with a share link signs in with any Planqix account first. If you left Read-only for viewers off, they also get review tools — otherwise everything is look-but-don't-touch.
2
Once inside. Recipients can flip between floor plans, pan and zoom the drawing, hover or click sign tags to read each message and see its artwork, and export the schedule for their own notes. They can't edit anything, and they don't see your drafting aids — just the finished sheet with its signage.
3
If redlines are on. Reviewers can propose changes — selecting signs, proposing new ones, flagging deletions, pinning notes — and submit them back to you as a package. Nothing reaches your project until you accept it in the Redline Inbox (part 16).
On site
19
Hand-off to installers
The Installer app is a paid add-on that puts the locked job on the phones of the crew fitting the signs — offline, on site, with photo proof of what went in. It's a separate installable app; you set the job up here in the editor.
1
Send the job. Choose Send to Install Team from Project Settings (part 15). That publishes the current state as a numbered version and puts the job on the Installer app — a crew only sees jobs that have been sent. Editing stays open. If the job changes later, press the same button again — now Start New Version — to issue version 2 and move the crew onto it.
2
Give the crew access. Installer access is billed per person as a seat on the project. Grant a seat to each crew member's Planqix account from your billing settings; they open /install in their phone's browser and use "Add to Home Screen" to keep the app on their device.
Installers only ever see jobs you have sent to the install team — never your live drafts.
3
On site. The app downloads the locked plan so it works without signal. For each sign location the crew can confirm it's installed, attach photos, and leave notes — photos and notes are the only things installers can add, and they queue up locally until the phone is back online, then sync automatically.
Reference
20
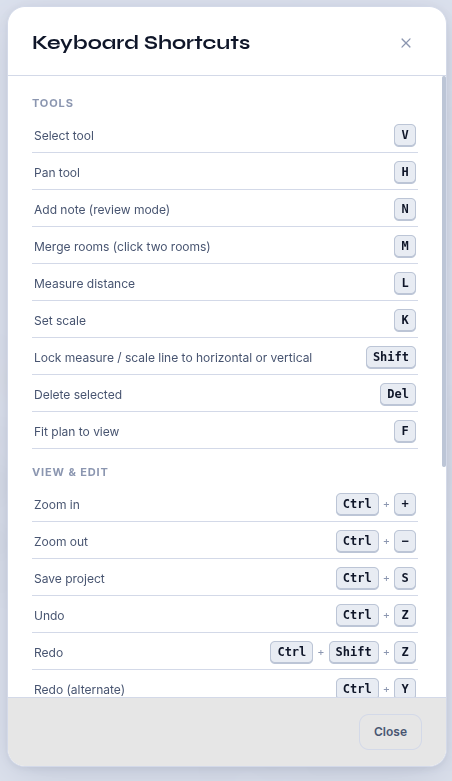
Keyboard shortcuts
Press ? at any time to bring this list up inside the editor, or find it under your username menu.
1
Tools
VSelect tool
HPan tool
KSet scale
LMeasure distance
FFit plan to view
DelDelete selected
2
View & edit
CtrlSSave project
CtrlZUndo
CtrlShiftZRedo
CtrlYRedo (alternate)
Ctrl+Zoom in
Ctrl−Zoom out
3
In the message box
EnterSave and jump to the next sign
AltEnterNew line within the message
4
General
EscCancel current action / deselect
?Show the shortcut list
A few more shortcuts appear in the in-app list — N, M, and the review keys — which belong to the review workflows rather than the hand-drawn one covered here.